Sauerkraut….the ultimate accompaniment

In this post I’m going to show you just how easy making your own homemade sauerkraut is and then a great and easy recipe for how to cook with it using your Fornetto!

For those of you familiar with Sauerkraut, you’ll know that it’s a food that has gone through the process of fermentation. That’s what makes it sour. Many people think that fermentation is connected to rotting and although certain bacteria are used to ferment, namely different species of lactic acid bacteria, fermentation for consumption is achieved in a controlled manner that allows the food to be broken down, soured safely by the lactic acid created by the bacteria and preserved naturally without the need for any added chemicals.

The result is an exceptionally healthy food, full of probiotics, that is easy to digest as enzymes and proteins have been partially broken down and the bacteria that did the job make up a huge part of the beneficial flora in our digestive systems. Once people understand that many of the foods that they eat on a regular basis have been fermented (also referred to as cultured) such as kosher dills,  yogurt and hundreds of other dairy products including cheese, opinions often change about fermentation.

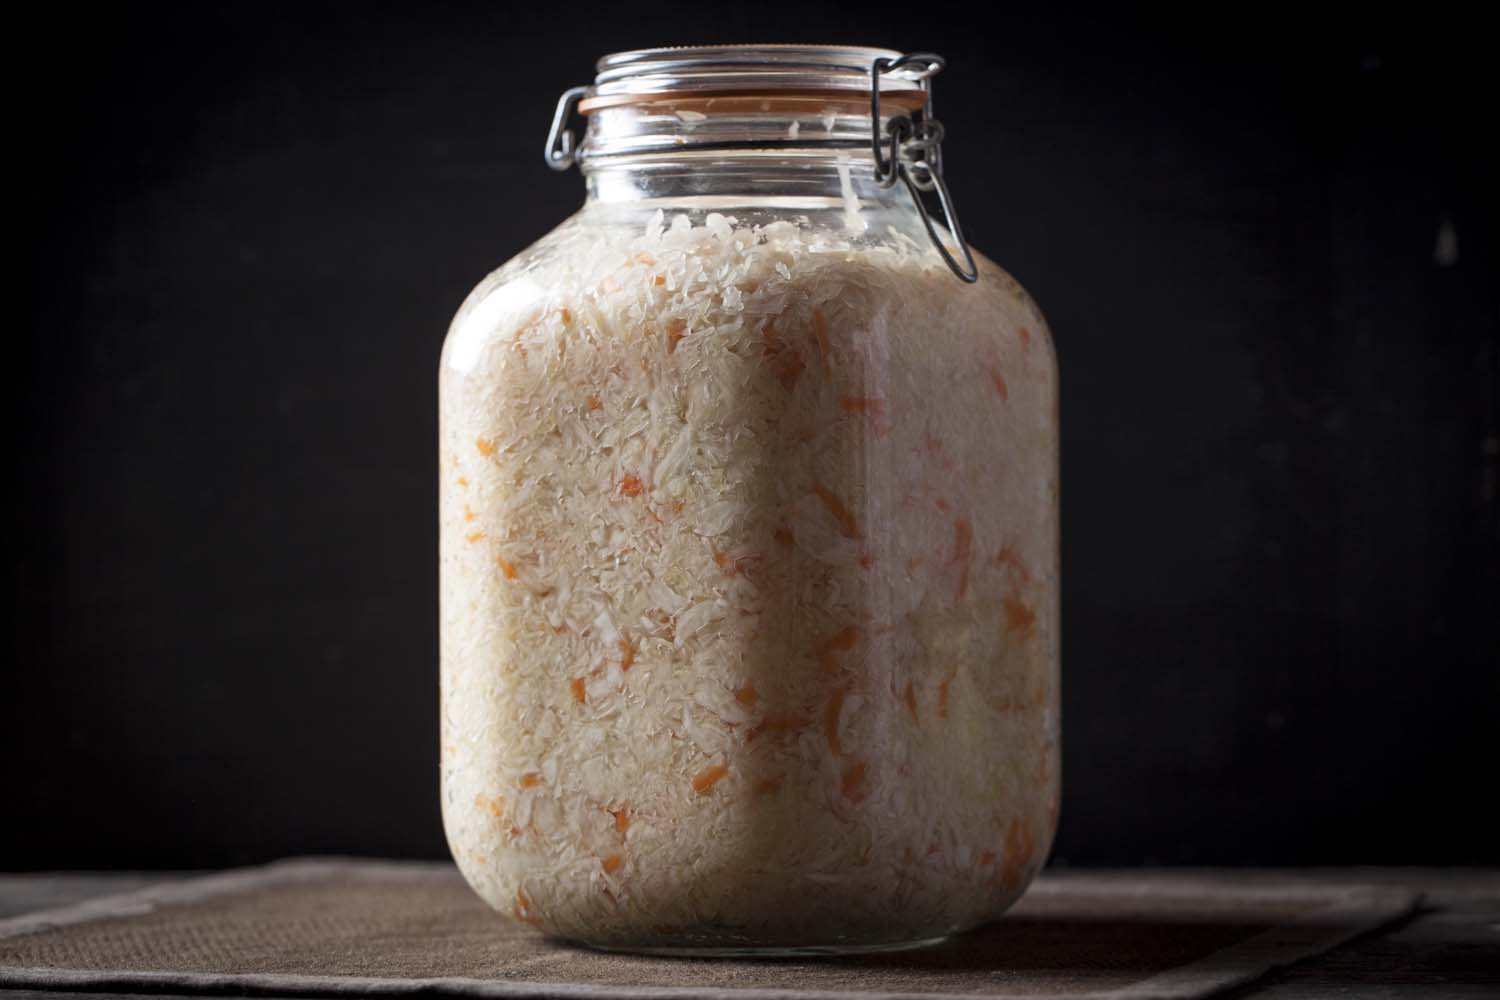
Here’s what you’ll need to make your own Sauerkraut. Cabbage, carrots if you like and salt. That’s it, that’s all. It really is that simple.

I always use a jar with a narrow neck, clip-style lid and gasket but feel free to use a wide-mouth mason-type jar, crock pot or barrel if you prefer, it all depends on your preference and the amount you’re making. When fermenting any vegetable, the golden rule is that it be kept away from any air until it has completed the fermentation process, at which point it can be kept in the refrigerator for several months. The way in which the cabbage is kept away from air is by keeping it submerged under its own juices. If you use a narrow-necked jar, you can simply push all the cabbage down forcing the liquid to the top and using a clean plastic bag filled with a bit of water, fill the neck to prevent the cabbage from surfacing (as you’ll see in the video) or you can weigh everything down using a plate and a stone if you’re using a vessel wide enough to do so. It all depends on the container you choose but I find the narrow-necked jar method the easiest. Scroll down to the bottom of this page to view the video demonstration or click here to read the method.

Whether you’re going to make the Sauerkraut yourself or buy it, below is a simple and delicious way to create a Sauerkraut based dish to cook in your Fornetto with lots of smoked meats that is sure to please any lover of smoked food. Be sure that if you are going to buy the Sauerkraut, to purchase one that hasn’t been spiced or prepared with wine.

As I mentioned, this dish is really simple and it’s often the simple dishes that have people coming back for more and more. This recipe is no exception and in fact it’s less of a recipe than a manner in which to prepare Sauerkraut.

You’ll need a good amount of Sauerkraut to line the bottom of a roasting dish thickly, mixed with bacon and red currants (fresh or frozen), doused with a good white wine like a Riesling and laced with dry mustard seeds. The amounts you use are completely up to you and besides using too much wine, which would make it too “liquidy”, you can’t really go wrong. The Sauerkraut mélange is then topped with any variety of smoked meats (preferably smoked in the Fornetto previously) such as a mix of smoked sausages, chicken, pork chops, ribs or turkey. Anything smoked works perfectly for this dish, though I would steer clear of smoked fish prepared in this manner as the humidity from the kraut will make the fish soggy. If your preference is fish, you’re better off preparing the Sauerkraut alone and serving it alongside smoked fish and potatoes, as potatoes are a more traditional accompaniment to smoked fish.

The way to cook this dish isn’t to heat it enough to bring it to a roaring boil as the meat and Sauerkraut are ready to be eaten as they are but rather to simmer it well enough that the alcohol from the wine evaporates, to allow the bacon and berries to infuse their flavours and to ensure that the mustard seeds plump up nicely. Ideally, if you have smoked the meats you’ll be using, you’re Fornetto will already be hot and it will be a cinch to bring it up to 170C (340F) to prepare the dish. Heat it covered for the first 30 minutes and uncovered for a further 30 minutes to allow the extra liquid to evaporate.

Serve the Sauerkraut and smoked meat medley directly from your roasting dish.

Serve it with beer, spicy mustard and horseradish on the side. This is a very hearty dish as it is, though if you’d like to serve a starch along side I suggest crusty bread or fries, but believe me, you probably won’t need to!

Serve it with beer, spicy mustard and horseradish on the side. This is a very hearty dish as it is, though if you’d like to serve a starch along side I suggest crusty bread or fries, but believe me, you probably won’t need to!

You’re in for a treat. Enjoy!

A cool note about Sauerkraut: Anyone taking antibiotics can benefit greatly from eating fermented/cultured foods as they naturally replenish the good bacteria in our digestive system that has been killed off by the antibiotics, which unfortunately, kill both beneficial and harmful bacteria.

Mushroom picking!

I love this time of year! After a hot summer, the weather is now beginning to cool off and it’s time to start thinking about pickling or fermenting your vegetables, curing your own meat and sausages and of course, picking nature’s “spory” little wonders that start growing amongst the bed of fallen leaves and pine needles that now make up most of the forest’s ground cover. All it takes is for the temperature to drop by just a few degrees, a few good rains and lo and behold………..wild mushrooms are in abundance!

Last week, we planned an excursion out of the city and into the fresh mountain air to scavenge for these beautiful and tasty delights. A strong word of caution however! If you have never been mushroom picking before, and aren’t familiar with wild mushrooms, take a good reference book with you so you can identify what you’re picking, take someone that’s in the know, ask people in a village or town nearby if you aren’t sure about what you’ve picked and NEVER eat anything you aren’t 100% certain about! I’m not a wild mushroom connoisseur by any stretch of the imagination and it’s important to leave your “I know everything” cap at home. Because mushrooms never grow in exactly the same way, and some toxic ones mimic the edible ones, be sure you know what you’re doing. I was really glad that we visited a nearby town where a very nice woman sorted through what we picked and turfed about a quarter of them!

That being said, and following those simple rules, mushroom picking is absolutely awesome. It’s a great chance to get out of the city (if you live in the city that is), breathe in the fresh air, and hike though the forest. Kids love it as well and are completely unaware of the educational value; an added bonus and surely something worthy of show-and-tell!

For this particular post (and recipe) we collected wild mushrooms that not only grow near to us in abundance but that are also available cultivated and sold in many specialty fruit and vegetable stores and grocers around the world. Truth be told however, you can feel free to use any type of wild mushrooms you prefer but don’t substitute dried/reconstituted mushrooms as this will alter the flavour of the dish greatly, if need be, use jarred or frozen. Mushrooms are interesting in this respect as dried mushrooms vary greatly in flavour to fresh ones. Another good example of this are sun-dried tomatoes versus fresh ones who’s flavours are completely different. Above is a photographic list of the mushrooms we picked.

Now that we’ve looked closer at the types of mushrooms we picked here and their distribution geographically (bear in mind that the above mushrooms can usually be found cultivated and sold fresh at your local specialty grocer), try to plan a trip to the forest to experience the invigorating feeling that comes with being in nature and picking your own mushrooms! If these varieties aren’t available to you, do some research and find out what edible mushrooms grow close to you and like I said, go right ahead and substitute the ones I used here for the ones that are available to you. If need be, use white/button mushrooms or any any other locally grown variety(ies) from your grocer.

With mushrooms as the focus of the dish I’ve prepared for this blog, let’s take a look at the wild mushroom cannelloni below and what you’ll need to prepare it!

Here’s the shopping list (the quantities are in the recipe). Wild mushrooms, lots of them! Thyme, rosemary, fresh tomatoes for your own tomato sauce or your favourite “passata di pomodoro”, béchamel, ground beef, veal, pork or a mix, ricotta, mozzarella, white wine, salt, pepper and of course the pasta. I also used an onion as I love the flavour of onion and mushrooms together. The pasta for cannelloni is sold in two ways, tubes which you stuff or sheets, similar to those for lasagne that you roll around the stuffing. The choice is yours but be sure to check out the video!

When baking the cannelloni, start off by baking it covered on a rack positioned close to the bottom of the Fornetto oven. You can also cook it beautifully in a conventional oven or a Fornetto smoker or kamado!

After they’ve baked covered, remove the foil and place them onto a rack positioned as close to the top of the Fornetto as possible. This will help brown the cheese.

Once fully browned, they’re ready to go!

Perfectly baked and scrumptious; you’re guests will come back for seconds. Guaranteed! Cannelloni also makes a great starter to any meal.

All that’s left to do is to garnish the cannelloni with a fresh sprig of thyme and rosemary, which really accentuates the “woodsyness” of the wild mushrooms, pour a glass of a full-bodied red wine and tear off a piece of crusty bread for sopping up any sauce left over on the plate!

Click here for the recipe!

You’re in for a treat. Enjoy!

Brined, half-smoked and slow roasted turkey

It may be out of your everyday norm but there’s nothing new about smoking a turkey. In fact, turkey has been smoked for generations and there’s no surprise as to why. IT’S DELICIOUS!

Smoked foods of any kind, be they meat, poultry, fish, dairy or vegetable are generally served in small portions as the catalyst on a great sandwich or salad or even as a flavouring for soups and sauces. The fact of the matter is however, that a whole portion of smoked ribs, ham, chops, sausages, fish and yes, chicken and turkey as well, on your plate is to die for. What’s important to bear in mind is the amount of smoke flavour you want to impart to your food when you’re smoking it. If it’s over-smoked, you can easily end up with food that’s bitter from the smoke or so smokey that it over-powers the rest of the meal. If it’s under-smoked, you may not even notice the smokey flavour!

On the same note, the amount of salt is key as well when smoking your food. Check out our original brine recipe below and continue reading for the variation on the brine I used for the turkey.

The difference between our original brine and the brine I used for the turkey is the addition of extra herbs and spices. What’s important to bear in mind is the quantity. A whole turkey is large and therefore needs to be completely submerged while brining it which means that the brine recipe needs to be increased in order for you to have enough to ensure that you have the correct amount to cover your turkey. In order to impart the additional flavour for the turkey brine, I added dried oregano, dried onion flakes, onion powder, cracked coriander seeds and fresh garlic to the original recipe.

Original Brine Recipe:

Ingredients:
6 litres (1.6 US gallons) of spring water or purified water
2 cups of sea salt or kosher salt
1 cups of sugar (white or brown)
3 tbsp of whole yellow mustard seeds (OMIT THIS FOR THE TURKEY BRINE)
2 tbsp of cracked black peppercorns
4 bay leaves, whole (CRACKED FOR THE TURKEY BRINE)
1 onion sliced into wedges
2 apples, sliced

For the turkey brine add:
1 tablespoon of dried oregano
1 tablespoon of dried onion flakes
1 teaspoons of onion powder
1 tablespoon of cracked coriander seeds
1 garlic clove, sliced in half

Make enough of the brine to cover the turkey completely. You will most likely have to double or even triple the recipe. Click on this link to follow the rest of the brine recipe and be sure to dry the turkey completely before oiling, seasoning (without the addition of extra salt) or smoking it.

You can also choose to rinse the turkey once it’s been removed from the brine. This will remove any extra saltiness and depends on your personal preference. Note that I, personally, always brine for short periods (less than 24 hours) at room temperature (in the coolest part of the house) because I order meat that’s been butchered the day of or a day ahead of when I need it. As a salt-brine is a cure, and because of the salt and the temperature at which it will be roasted/smoked you can rest assured that any harmful organisms are killed. Brine your turkey for a minimum of 12 hours up to a maximum of 24 hours. That being said, it’s ABSOLUTELY IMPERATIVE that you use the freshest produce you can purchase. If you are using meat that has been thawed, has been refrigerated for several days or if you are wary of food-borne pathogens, I suggest that you brine in the refrigerator. Avoid smoking turkeys that are larger than 7.25 kg (16 lbs) as they take too long and the increase in the possibility of food contamination rises substantially. If you need more turkey to serve all of your guests, I suggest preparing two. Check out the video below for the process!

Once the turkey’s been brined, it’s time to slow-roast and smoke it. Place the turkey directly on the rack and try to centre it as close to the middle of the Fornetto as possible. You’ll need a drip pan filled with water in the bottom of the oven. This is not only to catch the drippings, but to keep the turkey moist and to help the smokey goodness adhere to the bird.

As I mentioned earlier, the turkey I prepared here is very slowly roasted. A 6 kg (13 lbs) turkey takes about 6 to 7 hours at 110C (225F), of which the first three hours are devoted to smoking and the remaining time is left to roasting. That’s where the half-smoked part kicks in! Fell free however, to smoke it for the entire time using a smooth flavour, like oak. Use a digital meat thermometer inserted into the thickest part of the thigh away from any bone as that will influence the reading and test in several locations. When the temperature hits 75C (165F), it’s time to remove the turkey from the oven and allow it to rest.

Click here for more information about smoking!

Allow your turkey to rest, covered for at least 20 minutes before carving it. This will ensure that the liquids redistribute throughout the meat.

Serve the turkey with your favourite choice of vegetables, cranberry sauce and gravy!

Click here for more information about the Fornetto selection of red wine, cognac and muscatel Oak Barrel smoking chips!

We’d like to take the time to wish all of our friends in the U.S.A. a safe and healthy upcoming holiday. Happy Thanksgiving!

You’re in for a treat. Enjoy!

Minced meats part 2; Chipotle Burgers

It seems to me that these days, the word “Chipotle” is key in quite a lot of recipes! A real catchword or word-of-the-day and rightly so! Chipotle is awesome and it’s no small wonder that it’s in the spotlight and claiming huge renown on the world’s foodie stage. A good friend of mine even makes his own Chipotle and bacon jam! Yum!

If you aren’t sure what a Chipotle is, allow me to explain. Chipotle is a Mexican smoke-dried chili pepper. The variety that’s smoked the most is the Jalapeño pepper however, there are other varieties that are smoked as well, such as Serranos, Habaneros and Hungarian wax peppers. They are used as a spicy flavouring for soups, stews and marinades, among many other uses of course. It offers a full-bodied, earthy, smokey flavour with a medium to medium-high heat level similar to that of Tabasco sauce. Chipotle is sold whole, crushed, powdered, as a sauce and whole in cans in “adobo” sauce.

For this recipe you’ll need Chipotle sauce which you can find in most grocery stores alongside the other hot sauces or in the Mexican food section.

These burger should actually be called “Bacon, Cheddar, Chipotle and Smoked Paprika Burgers” because they are jam packed full of all those good things but we’ll use the shortened name from the main title. Below is your shopping list for the ingredients you’ll need for the Chipotle burgers!

Ingredients: (Makes about 6 large patties or 9 medium)

1 kg (2.2 lbs) Minced lean meat of your choice (Beef, pork, a mix of both or poultry all work well. Make sure the meat is lean, there’s plenty of fat in the bacon and cheese that will keep the burgers moist. Plus, if it isn’t lean, they will shrink down considerably while cooking.)
120 g (4.25 oz) Smoked bacon, chopped very finely
150 g (5.3 oz) Strong cheddar cheese, grated
1 Large egg
3 tbsp Fresh coriander, chopped finely and well packed
3 tbsp Chipotle sauce (or more!)
2 tbsp Yellow mustard
1.5 tsp Whole cumin seeds
1.5 tsp Onion powder
1 tsp Chili powder (the same used for making Chili con Carne)
1 tsp Spanish smoked paprika
0.5 tsp Sea salt

Thanks to our good friend Rick in the USA for the Fornetto burger idea and cooking method that inspired this post. Let’s check out his direct on the grill cooking method below!

Method:

  • Combine all the ingredients in a large mixing bowl and mix thoroughly.
  • Form into the desired amount of patties with your hands or using a burger press (see a previous blog here for more information). If the mixture is too wet you can add some bread crumbs to absorb the extra moisture. This won’t affect the flavour and will help create a stickier mix.
  • Remove the racks from the Fornetto oven and place a drip pan filled with water in the bottom. This will catch the drips and will keep the patties moist while they cook.*
  • Preheat the Fornetto to 200C (390F).*
  • Place the patties directly on one of the racks and when the oven is at temperature, place the rack with the patties into the oven, in the lowest position possible over the drip pan.
  • Cook for about 8 minutes per side or until you reach the desired doneness. Turn only once during the cooking and once turned, toast your buns beside them on the rack.

*You could easily grill the burgers directly on a gas or charcoal BBQ (with the lid on if you have one) or in a Fornetto kamado or smoker for additional smoky flavour!

While the burgers cook, prepare the simple Chipotle slaw! Finely dice and combine half of a small cabbage and half of an iceberg lettuce. Mix in 1.5 cups (375 ml) of mayonnaise, 3 tbsp of Chipotle sauce (or more) and the juice of 1 lime.

Serve the burgers on the toasted buns with slices of tomato, onion, avocado, fresh coriander, the Chipotle slaw and rings of pickled Jalapeño peppers! The cheese and bacon flavour bursts with every single bite and the Chipotle weds everything perfectly adding a touch of earthy smokiness and heat!

Brace yourself because these burgers make a mess while you eat them, but what good burger doesn’t? If you’re having a larger group of people, use both racks and be sure to switch them half way through the cooking process.

You’re in for a treat. Enjoy!

Stuffed for the holidays!

For some of you, Thanksgiving dinner is approaching fast. Here are three delicious Autumnal recipes for you to try on your holiday table this year using vegetables that you may never have thought about stuffing! Pumpkin with a curried beef filling, White Cabbage with a very traditional English flavour and Nappa (Chinese or Wombok) Cabbage stuffed Asian style.

Above are the main ingredients for the three recipes in this blog!

Let’s begin with the technique for hollowing out and stuffing these veggies!

The pumpkin is the easiest and doesn’t need much explaining. Cut a hole in the top to create a lid and scrape out all the pith and seeds using a spoon. Be careful using the knife! You can also use any large squash for this recipe. Simmer the pumpkin in salted water for 30 minutes or until the flesh starts to become tender.

For the white cabbage, begin by cutting off the top at a bit of an angle, like the pumpkin. Pierce through the layers of leaves for the lid with 4 toothpicks. This will ensure that it holds it together. Then, using a shape blade, insert the tip into the core of the cabbage and begin to twist.

Continue twisting the knife until pieces of the cabbage core pop out. When you’ve dug out enough using the knife, scrape away any extra using a spoon.

Scrape out enough of the core so you have enough room for the stuffing and simmer in salted water for about 45 minutes. Don’t over do the simmering or you’ll end up with mush!

For the Nappa cabbage, begin by simmering it first for about 20 minutes in salted water. Do not boil it! Allow it to cool in ice-water and then peel back the leaves. When the innermost leaves begin to crack when you peel them back, you can stop. (For the sake of the images, the cabbage above is still raw in order to demonstrate more clearly the process of peeling it back).

Using a very sharp knife, cut out the raw leaves of the simmered cabbage by slicing through the core.

Remove the raw leaves and the core and reserve them for another meal!

Lie the simmered cabbage leaves (that are still connected to the base) on their side and cupping three or four of the inner leaves, spoon in the filling. When all the filling is in, stand the cabbage back up and tie it off very well with kitchen twine.

Here you have the Nappa cabbage that was simmered first, then stuffed, tied and sprinkled with sesame seeds. Place it in a suitable, greased dish, such as the Fornetto Garlic Roaster dish I used here.

Preheat your Fornetto to about 190C (375F)!

Place the stuffed vegetables on the lowest rack. It is completely up to you but smoking these would be a great variation to the recipes!

Because the vegetables you’re stuffing are par-cooked and the filling is cooked, they only need to bake long enough to finish cooking the shell (like the white cabbage above for instance), to heat the centre through fully and set the egg, which binds the stuffing.

Here’s the pumpkin that was baked for about 1.5 hours. Times will vary based on the size of the vegetable you’re stuffing so keep an eye on it! You’ll notice string around the pumpkin in the image above and the white cabbage below. Do this to avoid the vegetable from splitting open white it bakes.

Both the cabbage and the pumpkin were baked in a greased Fornetto Pie Dish.

Nappa cabbage is far more delicate so I suggest covering it lightly while it cooks. You’ll want nice browning but avoid burning it. If any leaves burn, they can be easily peeled away and discarded before serving.

Because all of the stuffing for these recipes contain egg, the stuffing slices very nicely and doesn’t crumble when you cut it.

Serve the pumpkin as a starter dish accompanied with fresh coriander. To counteract the sweetness of the gourde, serve it with a spicy sauce or chutney. Click here for the recipe!

As I mentioned, the white cabbage is stuffed English style! A variant on “Bubble and Squeak” which is normally left-over potatoes and cabbage from a roast dinner fried up together and usually served for breakfast with bacon and eggs. This has all of that!

Serve it with fried cherry tomatoes and a good lager! Click here for the recipe!

You have a couple of options for serving the Nappa cabbage but I like slicing the top off and serving it whole at the table. You can also serve it sliced. Remember to remove the string before it goes to the table!

Serve it drizzled with dark soya sauce and top off with slices of fresh chilies and green onions! Click here for the recipe!

You’re in for a treat. Enjoy!

A holiday request from one of our Directors

When Fornetto became available on the French market, Peter, our European Operations Director asked me to prepare a traditional French apple pie or tart for a blog. A client in France thought it would be a nice idea and I said “Sure, no problem!”. After having done some research however, I discovered that France has a panoply of apple pies and tarts to choose from, all very different depending on the region, occasion, and style of cuisine. Some are very rustic and some are quite complex. Some take their influence from German origins while others are quite Mediterranean. Some are layered with custard and others with apple sauce. Some are baked upside down, some have pastry lids, some are topped with crumble and some are geometrically arranged with apple slices on the surface. So, which to choose?

A friend of mine is from the north of France though she’s lived in many different regions so I asked her for her input. Her answer was as follows, “I like the “classic” apple tart the best – it’s found throughout France”. I liked her answer because it’s actually a very eye-catching tart with the apples all laid out in concentric circles over the surface. It’s sure to delight everyone around your table, whatever the time of year. Let’s take a look!

The shopping list is quite simple. You’ll need puff or shortcrust pastry for the base. I used puff but shortcrust is more traditional. Soft fleshed apples like Gala or Fuji, lemon, sugar, cinnamon and vanilla for the apple sauce filling. Ginger jam or jelly for the glaze (any light coloured jam or jelly work well, like apricot for example however, ginger and apple go well together and add an even bigger holiday taste when combined with the cinnamon and vanilla) and a more robust apple, like Granny Smith, butter and sugar for the apple slice layer.

It’s important to bake the crust before filling it with the sauce and the apples or you’ll end up with mush. Bake it in a 200C (390F) Fornetto oven, kamado, smoker (or a conventional oven) for 20 minutes, remove it, glaze it and allow it to cool. Lower the heat in the Fornetto to 190C (375F) for baking the tart later on. While you have the crust baking, make the apple sauce filling and allow it to cool. Click here if you want to view the recipe now!

Once the sauce is done, prepare the apple slices by sautéing them in the butter with the sugar.

On the left hand side of the image are the apple slices before they’ve been sautéed. They should be about 3-4 millimetres (about an eighth of an inch), peeled and core removed. On the right of the image are the sautéed apple slices. Sauté them in the butter just long enough to make them pliable but not mushy.

Fill the glazed crust with the apple sauce and place the apple slices in concentric circles on the surface. Dust the apples lightly with confectioner’s sugar and bake the tart in the centre of the Fornetto at 190C (375F) for about 30 to 45 minutes. Move the tart to the top most position of the oven to allow the apples to darken around the edges if they aren’t darkening in the centre of the oven. Only allow them to darken on the edges, don’t allow them to burn!

Using your safety gloves, remove the tart from the oven and place it on a wire rack. Glaze the top of the apples and allow the pie to cool before cutting it.

Here you have it, a classic French apple tart that will definitely impress your guests. Click here for the full recipe!

To serve it, dust it lightly with confectioner’s sugar and serve it with vanilla or caramel ice cream. Delicious!

You’re in for a treat. Enjoy!

A festive spiral side dish!

This is a quick blog for everyone because I realise that we are all busy with the holidays; however, I really wanted to share this with all of you in case any of you are looking for a side dish that really stands out. It’s the time to be festive and this side dish has everything you need and want to accompany any roast you may be preparing. It’s a mix between a potato casserole (where the potatoes have been finely sliced and layered with cheese and onion) and a quiche. It’s intricate and beautiful.

I’ll admit that it takes a bit of time to prepare; however, the results are truly breathtaking! It’s a spiral of vegetables and cured ham that culminates in a roll that’s nestled in a crust of puff pastry and surrounded by a creamy and cheesy egg mixture that pulls it all together.

Here are some of the ingredients you’ll need:

Squash (like butternut for example), zucchini (courgette), sweet potato, white potato, carrots (orange and purple if you can find them), eggs, grated Grana Padano cheese, whole cream and dry-cured ham such as Iberico, Serrano or Prosciutto. (The ham can be left out to turn the pie into a lacto-ovo vegetarian dish as well.)

If you have a mandolin, use it to slice everything lengthwise and evenly. If you don’t, use a knife and try to cut everything thinly, about 2 mm (1/16 of an inch) thick. Blanch all the vegetable slices in salted boiling water for one minute and stop their cooking by plunging them into ice water, keeping all the vegetable types separate.

Click HERE to read the recipe now!

Line the Fornetto pie dish with parchment paper and prepare the pie.  The Fornetto Oven, or your kamado, smoker or conventional oven should be preheated to 180C (350F).

What makes this dish really eye-catching, besides the fact that the vegetables are swirled inside a puff-pastry shell, is the fact that the purple carrots bleed into the other vegetables and makes it very exotic looking. If you can’t find purple carrots, try beets. They share their colour just as easily as the carrots do!

Once you’ve allowed the pie to cool, remove it from the pie dish. It will come out effortlessly because of the parchment paper. Be sure to serve it whole at the table and slice it in front of your guests.

When you slice it, you’ll notice all of the different colours and layers formed by having rolled up the vegetables before putting them in the pie shell. All this is held together with the cheese and egg mixture and despite this, the pie remains light; unlike a more dense quiche. You can easily serve it as a main as seen above with a salad on the side or as a side dish to accompany a hearty roast. After all, it’s basically is all the ingredients of normal side dishes literally “rolled” into one!

From the entire team at Fornetto, we wish you a Happy and Healthy Holiday with this colourful rendition of “classic sides” rolled into one!

You’re in for a treat. Enjoy!

Braised Beef Shank at its best – Beef Ossobuco

If you’ve ever eaten in a fine Italian restaurant, you would surely have seen Ossobuco or Osso Buco on the menu. Traditionally speaking, Ossobuco (Ossobuco in bianco), a dish native to Milan is made with veal shank and vegetables and is cooked in a mixture of white wine and broth. It’s flavoured with cinnamon, bay leaves and gremolata (a very finely chopped mix of flat-leaf parsley, garlic and lemon peel). In Italian, Ossobuco means “bone with a hole” which describes the marrow bone located in the centre of the generally tough and fibrous leg meat.

For this recipe, I’m going to use beef instead of veal for the simple reason that I want a very rich beef flavour in the end. As I mentioned, Ossobuco refers to the cross section of bone in the centre of the cut of meat. This is a marrow bone and as the meat cooks, the marrow softens and becomes quite buttery. We’ll talk more about this below.

I used the word braised in the title of this post and for a good reason. Braising is a cooking technique that involves two types of cooking; dry heat and wet heat. When braising anything, especially meat, you begin by frying it over very high heat in order to sear the surface. The meat is then placed in a stew pot or casserole where liquid is added to cover most of it and it cooks on low heat for a long period of time.

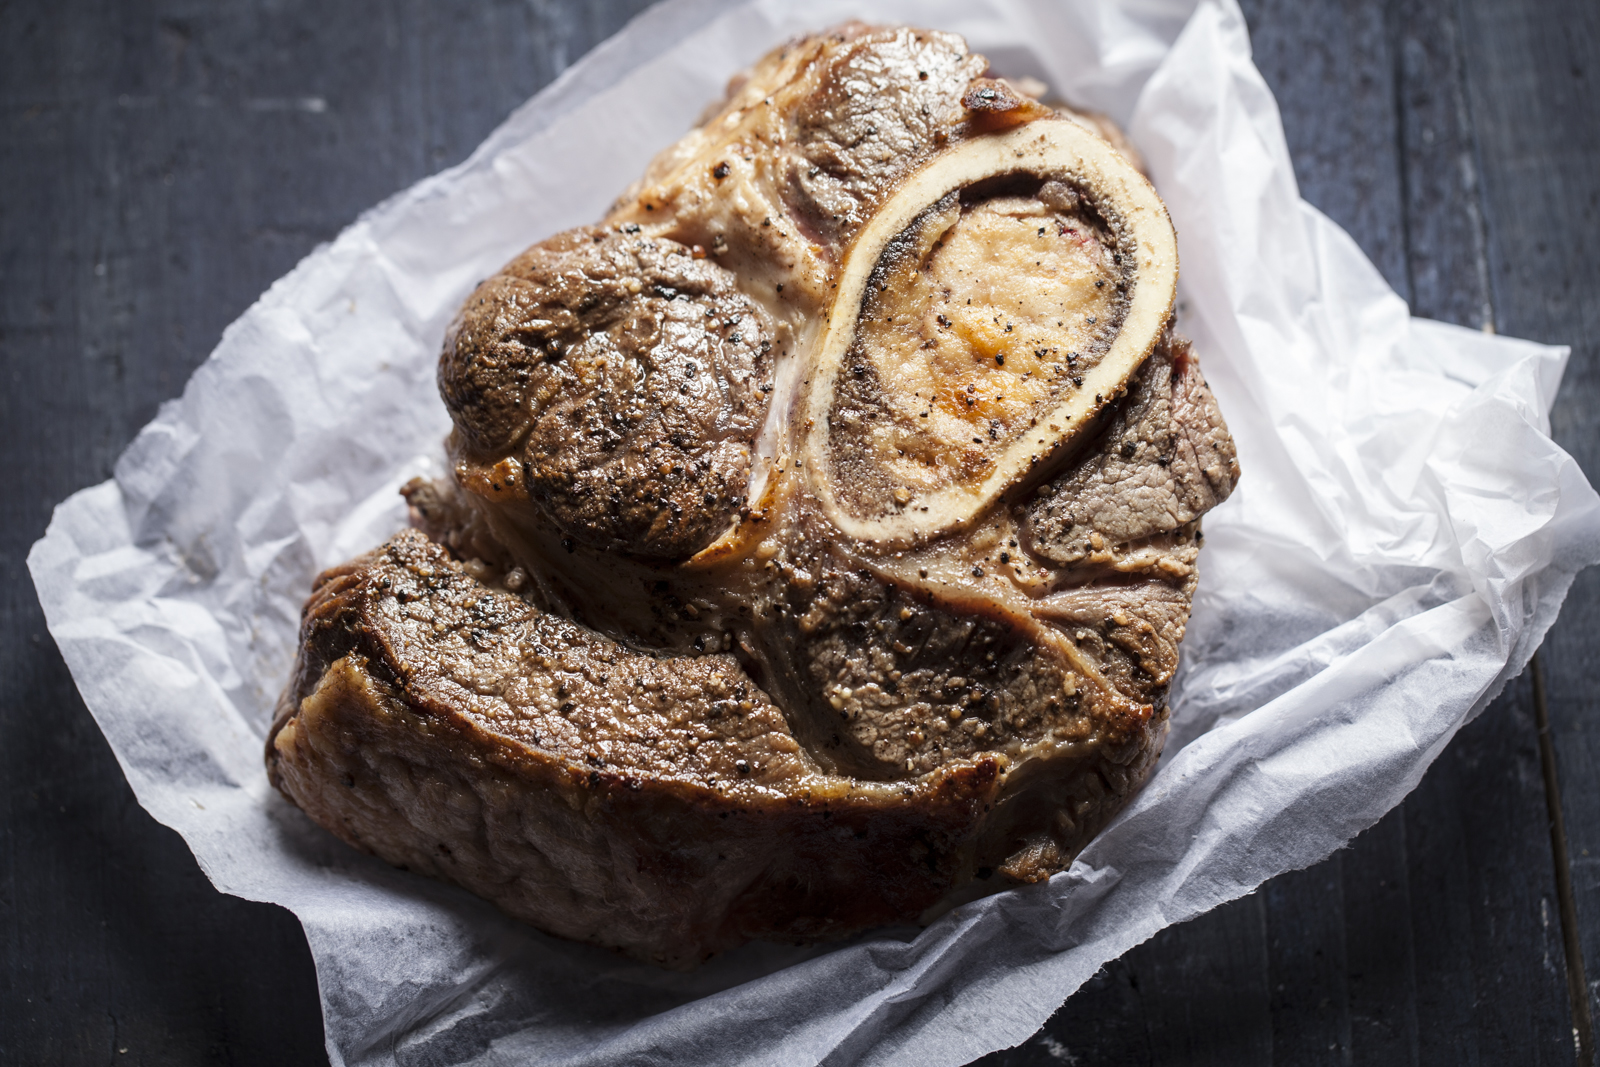
So what exactly does braising accomplish? Tougher cuts of meat are generally the fibrous parts of the animal where the muscles were used extensively during the course of its life. They are high in collagen content and when they are cooked quickly, this toughens and gives you a cut that’s very tough and chewy which is less than desirable. By allowing the meat to cook for an extended period of time, you give the collagen a chance to break down and convert to gelatine, a substance that’s also naturally found in bone, as the meat tenderises. In the image above you have an example of the colour you’re wanting after having seared the meat. Be sure not to allow it to brown too deeply or to harden to a crust as no mater how long you cook meat that’s been over-seared, it will never soften up. A light golden hue on the meat suffices.

When the meat has been fried, continue on to lightly fry the vegetables, all of them except for the potatoes. Frying the vegetables prior to cooking them in the stew pot will deepen and change their flavours dramatically giving you a richer flavour in the stew. Place the meat and the chunks of raw potato in the pot first and add in the lightly fried vegetables over top. Click here to view the full recipe now!

It’s now time to prepare a roux of flour and butter and to create the wine and beef broth gravy in which the meat will stew (you can refer to the recipe now to learn how to create a roux; click here). Because I only add salt and pepper and don’t dredge my meat in flour before frying it in this recipe, the roux is important in order to give the gravy more body and consistency.

Bake the beef Ossobuco in a preheated 170C (340F) Fornetto oven, kamado, smoker or conventional oven, and be sure that the stew pot is centred in the oven by either moving the rack up or down.

Bake for at least 3 hours without opening the door and after the 3 hours have elapsed, test the meat by trying to pull it away from the bone. If the bone falls away from the meat easily, it’s done. If not, place the lid back on the pot and continue cooking the stew checking it regularly until the meat is completely tender and done.

After having stewed the entire mixture, you’ll notice that the vegetables will have fallen, rendered much of their liquid and added to the wine and broth mixture, leaving you with a flavourful and rich gravy to spoon over the meat and veggies when you serve them.

As I stated earlier, the collagen in the meat will have broken down during cooking and will leave you with incredibly tender meat that will pull apart or cut with a fork with ease!

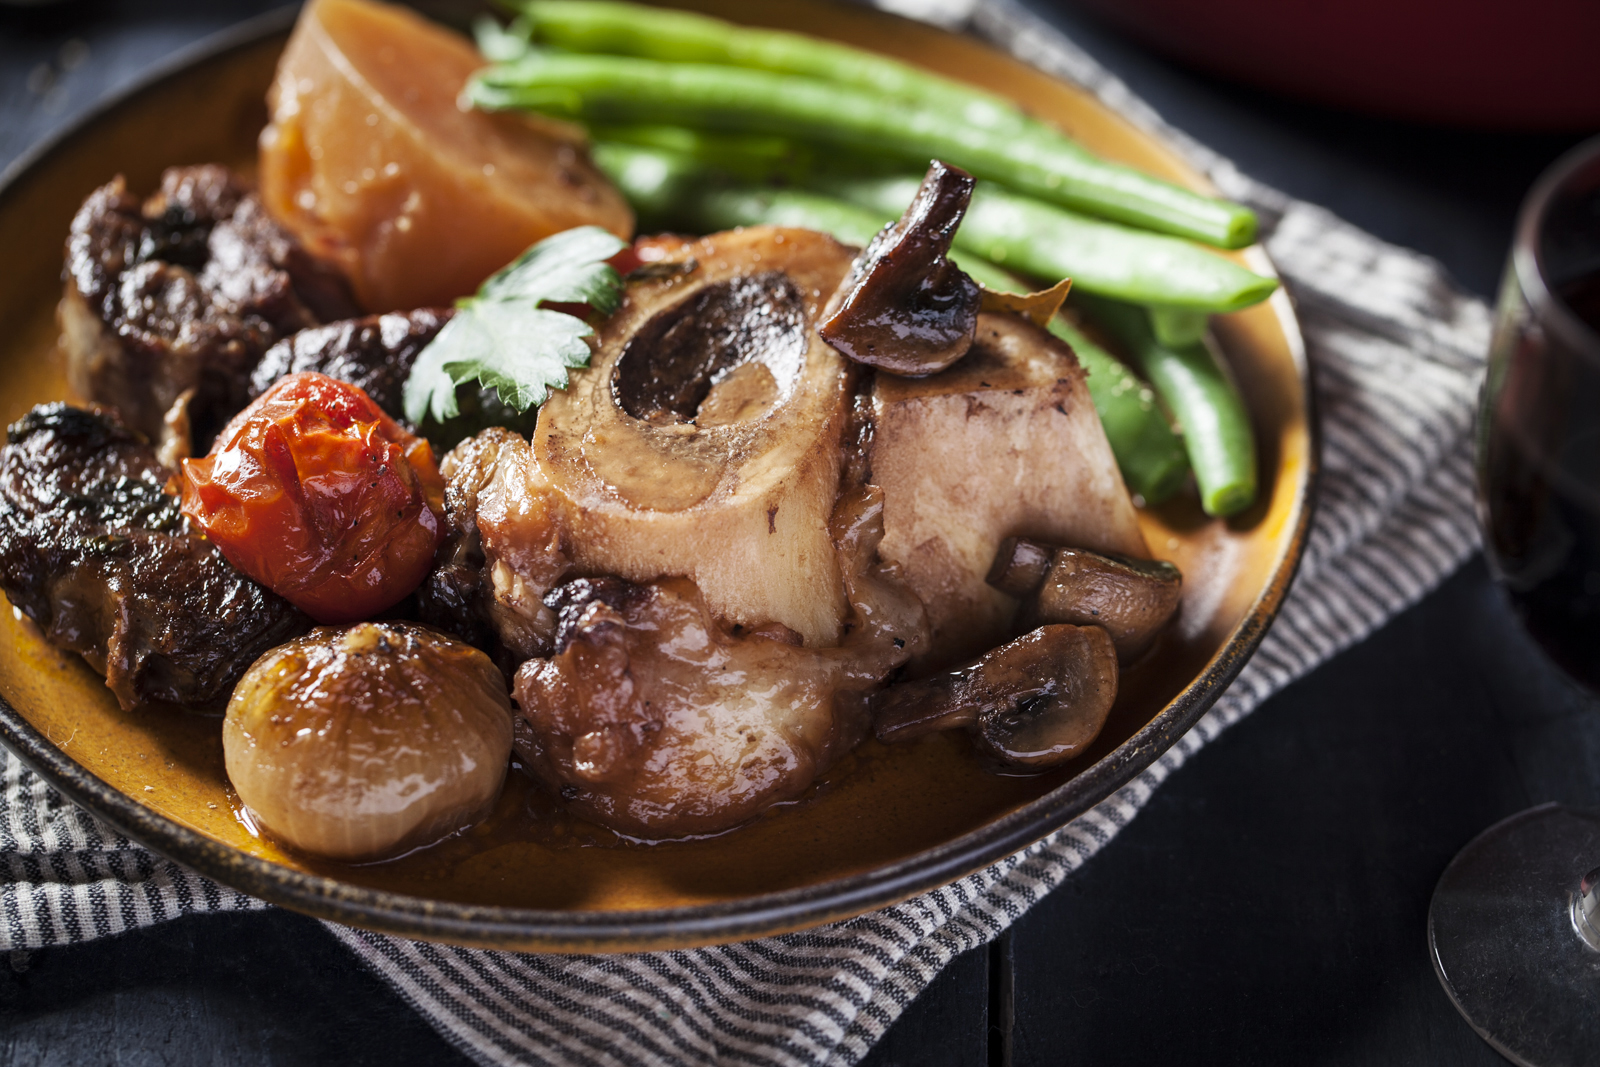
My favourite part of Ossobuco, and this rings true for very many people, is the buttery marrow inside the bone. There isn’t very much of it, that’s the only downside in fact however, spread like butter on bread and sprinkled with rock salt, it’s a huge treat. Don’t screw your nose up at it without having tried it first. It’s very delicate in flavour and absolutely delicious!


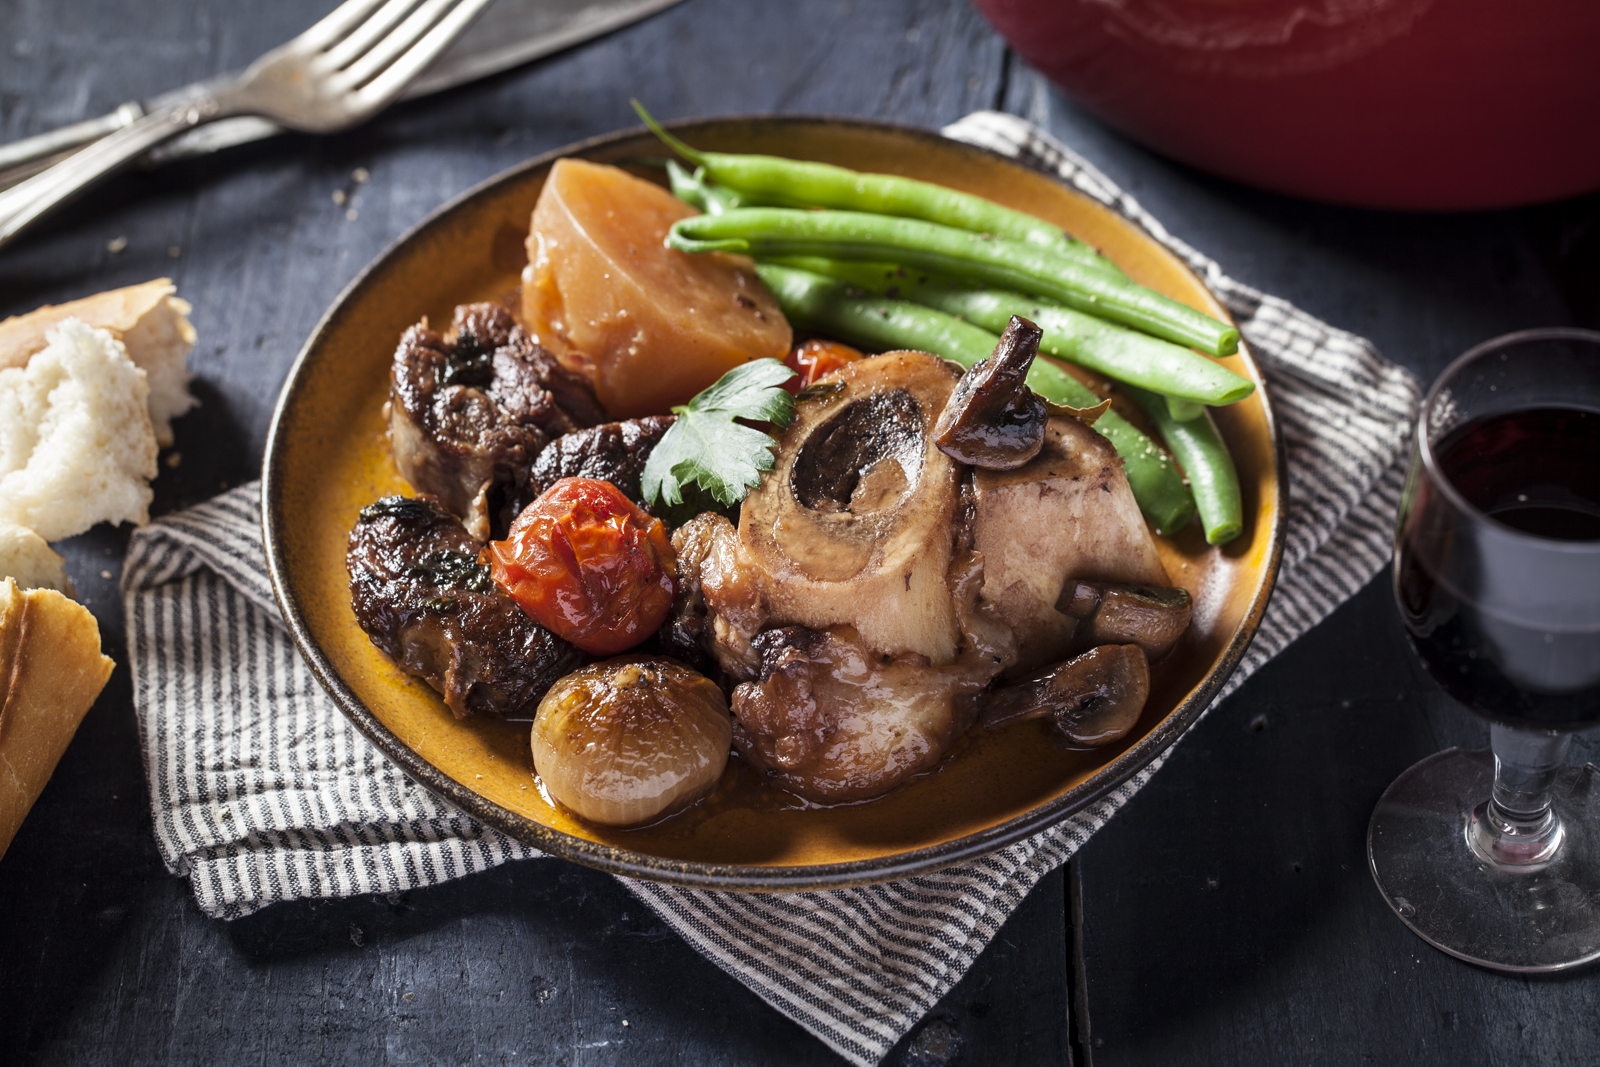
There you have it, Ossobuco done with beef and red wine. Nothing could be further from the traditional Milanese veal version but there are also very few things that beat this particular beef stew! Serve it up with a side of your favourite greens and crusty bread on the side.

You’re in for a treat. Enjoy!

The charm, mystique and flavours of Marrakesh

Morocco has long been a popular destination for tourists and has of course evolved over the last few decades from a country that, to a Westerner, may have seemed so incredibly foreign, to a land that has both embraced 21st century technology and maintained their unique and beautiful culture.

As a country that still has a very prominent monarchy and with Marrakesh being a mainstay of the royal family, the city is scattered with palaces, regal abodes, beautiful parks, green spaces and perfectly manicured trees.

Don’t be fooled by some of the palm trees you’ll see when you go, however. Creatively camouflaging otherwise ugly 21st century technology has been turned into an art form; some of the palms are actually manmade telecommunication towers. Ingenious!

To the unknowing eye, this may seem like a scene from a lush tropical rain forest when in fact it’s right in the city centre at the technology park.

Bitter oranges grow all over the city and if you arrive in the spring, the trees are in full bloom and the air is ripe with the sweet smell of citrus blossoms reminiscent of jasmine. Interestingly enough, these oranges are only good for making marmalade as they are wickedly sour. The thousands of trees around the city produce tons of bitter oranges that are then collected by a Moroccan company and processed into export quality marmalade.

The parks and green spaces in Marrakesh are truly a sight to behold. The landscaping and manicuring is undoubtably world-class and truly beautiful.

Morocco is, in fact, only about 15 kilometres (9 miles) from the European Gibraltar coastline and can be seen on the horizon on a clear day. With just a quick flight or ferry, Morocco is easily accessible to many tourists visiting Europe wanting to see something unique. It is the ideal location for a long-weekend getaway when you’re yearning for something exotic with a friendly atmosphere.

The old city is littered with tiny passages and doorways that lead you into the world renowned Souk; an unbelievable network of alleys and passageways making up one of the largest street markets in the world.

The very early morning at the Souk is quiet but don’t let that fool you. As the day progresses, the passages becoming teaming with locals, vendors and tourists alike.

As one would expect, the Souk is still a place where you can barter to your heart’s content. Not knowing what was in store for me, I was pleasantly surprised during my entire time wandering aimlessly (the best way to do it, by the way) throughout the Souk. We found the merchants and locals to be very friendly, respectful and helpful and if you weren’t interested in what they were selling, that was just fine….”other tourists will buy it” many boasted, as they chuckled under their breath!

The mosques and architecture were impressive in the sense that you had a bit of everything scattered throughout Marrakesh. Ramshackle old places next to the magnificent mosques and palaces leading to super modern buildings in the newer part of town. The entire city seems a bit paradoxical; it’s truly amazing!

That being said, don’t let the outside of those old run-down buildings fool you from their exterior! Once inside, you’ll be amazed by the carvings and intricacy of how Moroccans like their interiors designed.

A close-up of the carved walls.

The food of Marrakesh, and Morocco in general, is very flavourful, mixing spices into rich blends and combining them with meat, poultry, seafood, fish and vegetables. They cook primarily using a tajine (click here to see our lamb tajine blog) and serve the stewed dishes with a selection of salads, flat breads and couscous.

Dinner in Morocco is hearty and bountiful. Here we started off with seven delicious salads, all of which were completely unique. They, of course, were accompanied by a traditional wholemeal flatbread.

The main course was a delicious chicken tajine served with olives, couscous and vegetables. I’ll show you how to cook this dish using the Fornetto Bread Cloche, but you could also use a tajine! As you can see in the image above, The Fornetto Bread Cloche is strikingly similar to an authentic earthenware Moroccan tajine and works just as well as a tajine ever could!

If a tajine is not your cup of tea, visit the night market where you can indulge in all those delicious Moroccan salads as well as beautifully grilled meat, poultry and fish.

As a Halal nation, Moroccans pride themselves in offering the freshest produce and meat available. A treat both for the eyes and the palette.

The spice market at the Souk is any cook’s wonderland. It’s like being a kid in a candy store. The aroma of spices is in the air and the vendors are creative types that will happily mix you up their favourite blend of an extraordinary Ras El Hannout (a Moroccan spice blend similar to a curry or Indian Garam Masala), like the one you’ll need for the recipe below.

Click here to view the recipe in full for our Moroccan Chicken, Preserved Lemon and Green Olive tajine!

You’re in for a treat. Enjoy!