Appetisers for Easy Entertaining Part 1

Entertaining, no matter how involved or for which occasion it may be, need not be complicated and the recipes in this blog are easy to prepare and loaded with flavour. The star in this post is puff-pastry, the very same that we discovered while making chicken pot pie and it makes life simple because it can be purchased pre-made and loaded with virtually any fillings. What’s important to remember when working with puff-pastry is to allow it to come to room temperature before manipulating it. It’s also important to remember that a beaten egg, brushed over the outside of the puff-pastry before baking it will ensure a shiny, crisp and golden-brown crust.

First up on the list of easy things to make are shrimp and smoked salmon vol-au-vents. It’s important that when baking in the your Fornetto, that you control your heat, around 190C (375F). This will ensure that your pastry cooks and rises properly without burning. The same applies whether you are cooking in a Fornetto Oven, kamado, smoker, or conventional oven!

The top rack of the oven here is holding one of the Fornetto pizza stones. What’s great about pizza stones for baking anything, not only pizzas but any kind of bread or pastry, is that they are a porous surface that allows for the bottom of the baked good to crisp up. If the pastry you are using is a greasy type of pastry, I suggest baking on a piece of parchment paper, which itself is porous as well and does not affect the baking at all. Avoid using foil or wax paper however, as this will create a barrier that will lock in moisture and create a wet and soggy pastry or bread. (Click here to see our current list of accessories to find out more about pizza stones).

Puff pastry’s ancestry is often linked back to somewhere in the 17th century and is at times attributed to Claude Lorraine, a famous French Baroque painter. He’s been attributed with making the buttery layered dough, similar to that of a croissant when baked, for his sick father. History does suggest however, that the dough is much more similar to the Middle Eastern phyllo dough, a similar, crispier, layered pastry using olive oil, that is famous for Baklava and Greek Spanikopita. Documentation of phyllo is found dating as far back as the Muslim occupation of Spain and it’s far more likely to have been converted from the original thin layers of pastry laced with olive to a laminated pastry spread with butter. This change either took place in Germany or Italy, centuries ago.

When using puff-pastry, it’s very important not to overwork the dough or pierce it as this will stop the flaking process during baking. The way in which puff pastry puffs and flakes is by steam inside the dough pushing its way outwards, forcing each thin layer to separate from the next and to puff-up.

Next up is a classic, the sausage roll. Though these are classic they leave plenty of room for personal inspiration. You can buy sausages, of course, but you can also make your own sausage meat using your favourite ground meat or poultry, herbs and spices. Try turkey or chicken breast for a more lean take on the classic. As the meat looses its juices while the rolls cook, I suggest the use of parchment paper once again to ensure that the paper absorbs most of the liquids and allows the bottoms to crisp-up.

Serve all of the appetizers seen here with fresh fruit and a good wine. They all make for a nice starter to a meal or can be served at a casual social gathering. Click the links below for the recipes.

Try serving the sausage rolls with your own homemade spicy tomato chutney or click here for my recipe.

I did two bries covered in pastry for this shoot, one plain and one with wild-cherry compote. Use any type of jam, jelly, or compote of your choice and serve it with the same fresh fruit as the compote, jam or jelly you used. Click here for the recipe!

Finally click here for the recipe for shimp and smoked salmon vol-au-vonts!

You’re in for a treat. Enjoy!

Minced Meats Part 1; Stuffed Salisbury Steaks

Minced meat (not to be confused with sweet “mincemeat” which we will review nearer to Christmas) is any meat that has been minced or ground with the use of a manual or electric grinder. Available in many different qualities depending on your taste, from ground inexpensive cuts to filet mignon, and in many different grades depending on the amount of fat ground into it.

The less fat the leaner the ground meat is, logically speaking. Mincing meat is not only reserved for what we are used to seeing at the grocery store either. In fact, basically all types of meat can be ground, not just beef and pork. Chicken, turkey, lamb, veal and fish are all options that are available at most butchers or fish mongers.

An important factor to consider when buying ground meat of any kind is the amount of fat content. Why this is important is because during the cooking process the fat melts and the original size of what you’re cooking can shrink considerably. This is a bit of a catch twenty-two however, as the leaner the meat is the drier it is once it cooks through.

Below is a list of different grades of minced beef that are available on the market. The percentage indicates the amount of lean meat. Other types of meat such as poultry are relatively standard and lack the same options that beef provides. Special grinds can always be prepared by a butcher however.

  1. Ground Beef (the most common): 73-77%
  2. Ground Chuck: 78–84%
  3. Ground Round: 85–89%
  4. Ground Sirloin: 90–95%

It is important to cook any minced meat purchased at the grocery store properly and to keep it refrigerated until it’s needed to avoid bacteria. I highly recommend that if you are using any ground meat that will be served raw such as Steak Tartar or if you prefer your burger on the rare side, that you purchase your meat directly at the butcher the day you need it and have it ground by them. (Excluding poultry or pork which should always be fully cooked!)

Now that we’ve settled the basics for minced meat with regards to types, fat content and safety, let’s take a look at what to do with it!

Minced meats of all sorts are used all over the world for so many different things. Sausages are stuffed using minced meat, meat balls and meat sauce are immensely popular as are shepherd/cottage pie, meatloaf, chili, kabobs, stuffed vegetables, and the list goes on and on and on! In this series of blogs that revolve around minced meats of all different kinds, we will be exploring numerous dishes that use minced meat and that can be prepared in the Fornetto oven, BBQ, smoker or kamado.

In the above image are some of the ingredients you’ll need to prepare the century-old dish created by Dr. Salisbury; the Salisbury Steak, similar to the hamburger steak. Mine varies greatly to his as I stuff mine with a mix of caramelised onions, mushrooms, and bacon and serve them Stroganoff-style with brown gravy and mashed potatoes on the side.

Note that I will be using a burger-press here and if you don’t already have one, I suggest investing in one. Not only do they ensure that all the patties you’ll be making are even and compact (very important here) but they make life so simple. Don’t fret if you don’t have one however, this can all be done by hand as well.

Begin by caramelising your onion first as they take the longest. Be sure to be patient when it comes to caramelised onions! When they are done properly, over very low heat for a long period of time, roughly 45 minutes or longer, they should be caramel in colour and should be sweet to the taste. Do not rush them as they will burn and burnt onions are bitter and unpalatable. Sautée the mushrooms and bacon as well, allowing them to brown but not burn. The top row in the above picture are what you should be aiming for when preparing the stuffing.

Once the onions are caramelised and the bacon and mushrooms are sautéed, chop the mushrooms and bacon finely and mix them together with the onion to make the filling.

Now, let’s take a look at how to use a burger press.

Each of these Salisbury steaks will require two patties. Most burger presses are similar in size and will give you a patty that’s about 340gr (12 oz. or 3/4 pounds). For these stuffed Salisbury steaks you’ll want to use ground beef that is higher in fat content, such as ground beef or ground chuck. By doing so, the meat will shrink during cooking and will leave you with portions that one person can eat or that can be easily split in two to share. If you use a beef that is lower in fat content, it will shrink less and you’ll most likely end up with about 700gr (25 oz or 1.5 pounds) of stuffed meat which would be considered more than a single portion. The reason that these need to be made so large to begin with is because of the stuffing which we will see further down. Begin by lining the burger press with plastic wrap and weigh out balls of 340gr (12 oz.) that you’ll place in the centre of the press.

Place plastic wrap over the top of the patties and using your fingers, work the meat towards the walls of the press. You may be wondering why the use of plastic wrap (cling film) but you will see why as we move on.

Using the top of the press, push down as firmly as you can without the meat escaping through the sides. This will ensure that the meat is perfectly compacted. It’s important that the meat is compact and free from any holes to ensure that the filling doesn’t fall out while it’s cooking and that the patties don’t split.

Once pressed, and this is where the plastic wrap comes in handy, simply lift them out of the press, no fuss no mess!

Place the stuffing in the middle of one of the patties leaving enough room around the sides to be able to seal it once the other patty is placed on top.

Place the second patty on top of the one with the mound of stuffing.

Using your fingers, carefully crimp the meat from the two patties together to seal them.

This is what you should end up with when the patties have been sealed together around the stuffing.

Bake the stuffed Salisbury steaks in a preheated 190C (375F) Fornetto for about an hour or until the size has reduced and the fat is rendered from the minced meat. If unsure that the meat is cooked properly, use a meat thermometer. The internal temperature should read 75C (170F), which should take about an hour to an hour and fifteen minutes. This dish should be cooked until the meat is well done, similar to that of a meatloaf and because it’s served with a Stroganoff sauce, it is quite alright if the meat is well done.

Bake your potatoes at the same time and during the last 30 minutes bake your carrots or any vegetable of your choice in a covered dish.

In this image, I’m using the Fornetto baking dish, pie dish and garlic roaster. Naturally, all the Fornetto ceramics can be used for many more things than their names suggest, as you can see here. Click here to find out more about our ceramics.

These are Parisian style potatoes that can be purchased in most supermarkets. If you can’t find them however, simply skin new potatoes and boil them until just tender. Remove them from the boiling water, allow to cool completely and then season them with extra virgin olive oil, salt, pepper and paprika. Place them in an oven-safe dish and bake until golden and crispy.

Serve the stuffed Salisbury steaks with a Stroganoff sauce, potatoes (or egg noodles if you prefer), vegetables of your choice and sweet or brined pickles, a traditional accompaniment to Stroganoff. Click here for the recipe!

You’re in for a treat. Enjoy!

Flammkuchen or Tarte Flambée

Pizzas have many different variations all over the world and in fact, just because the Italian version is the most common on an international scale, this doesn’t mean that others are less flavourful or delicious and this is why we’ll be looking at the Alsatian Flammekueche. Known in German as the “Flammkuchen” (a subtly different spelling and pronunciation from Alsatian), in French as the “Tarte Flambée” and in English translates to “Flame Cake” or “Flambéed Pie”, the Flammekueche has its origins implanted deep in Alsatian culture.

Alsace is a province in France that shares its border with Germany and Switzerland. Traditionally speaking, Alsace has it’s own language and culture that resembles that found in other countries that speak Allemanic-Geman variants either throughout the entire German-speaking parts of a country such as in Switzerland and Liechtenstein or in certain more concentrated regions of Germany, Austria, Italy, France, and the German Colonia Tovar of Venezuela. Certain Amish groups in the U.S.A. still speak Allemanic-German today.

The French province of Alsace is rich in culinary history that leans far more towards the German end of the spectrum than the French. It is a large wine producing region, predominantly whites, namely world-renowned Riesling and Gewürztraminer and is also Frances most important producer of beer. Kronenbourg and Karlsbräu are available on the international market and are both examples of well-known Alsatian beers.

One of the most notable factors that make a Flammekueche a Flammekueche is the use of crème fraiche (similar to sour cream though less sour and higher in fat content), fromage blanc (similar to quark though resembling the texture of cream cheese with less fat content) and smoked bacon, better known as lardons in Alsace. Alsatian cuisine is marked by the use of pork in various forms and it’s therefore not surprising that the most traditional form of the Flammekueche includes smoked bacon.

Other ingredients included on the list are the simple bread dough which forms the base, finely sliced onions, a pinch of nutmeg or caraway seeds, salt and a generous grinding of fresh pepper. Variations are huge, just as they are among the Italian counterpart and vary as greatly as the families that make them! Other toppings include the addition of grated cheeses such as gruyère, munster and even the addition of fresh mushrooms. For this post I’ve recreated the original with the onions and bacon and a second version of my own with smoked salmon and fresh-water shrimp.

The Flammekueche was typically a dish made at home. It didn’t really even hit the urban scene until pizza’s popularity took off in the during the mid-1900’s which caused the proliferation of many pizza places throughout the world. In fact, the flambéed treat was never flambéed at all. The Flammekueche was always baked in a wood-fired oven, just like pizza however, instead of being considered a main-dish, it was used to test the oven temperature before baking more elaborate dishes or bread and eaten as a light snack. When the Flammekueche would bake fully in a couple of minutes, the edges would char lightly and this would indicate that the oven was at temperature. Try doing the same when baking your own bread in the Fornetto!

Therefore, I probably don’t have to mention this but I will nonetheless. You’ll want to have you Fornetto at maximum* temperature when baking Flammekueche, in the same way that you would pizza, in order to cook them in 1-2 minutes. Traditionally, they are rectangular and very thin (0.5 cm or about 0.2″) though feel free to make them round or thicker if you prefer. I use parchment paper because it makes the very thin dough easier to manipulate and turn inside the cooking chamber with the help of the bamboo pizza peel. Click here to view the pizza peel and remember never to exceed the maximum recommended temperature in the Fornetto of *350C (662F).

When the Flammekueche is done, remove it from the oven and allow it to cool slightly before cutting.


The edges of the dough should be slightly singed as should the tips of the bacon and onions. Enjoy it with a frosty mug of your favourite brew or try an Alsatian beer as something new.

As I mentioned earlier, I’m including a variation of my own which is the same as the Gratinéed (melted Gruyère) version I prepared above. This one has smoked salmon, fresh-water shrimp and instead of using nutmeg, I substitute it with finely chopped dill. Fell free, as you would with pizza, to use whatever ingredients you like. However, bear in mind that a traditional Flammekueche is meant to be thin so don’t overdo the toppings or you’ll end up with a soggy dough.

Bake it in exactly the same way as the traditional one, until the edges start to singe and the surface browns slightly. What’s good about doing a couple of variations of a Flammekueche or pizza is that, everyone can pick their preference. You can also invite your guests to bring their own toppings. Simply prepare the dough ahead of time, heat up your Fornetto and allow your guests to top and bake their own.

Enjoy the smoked-salmon variation with a sprinkling of fresh lemon and an Alsatian Riesling (dry/semi-dry) or Gewürztraminer (sweet) depending on your preference. Click here for both the bacon Flammekueche recipe and smoked salmon alternative!

You’re in for a treat. Enjoy!

Dubrovnik, a Walled Treasure in the Land of the Dalmatians

This blog takes us to a gem of a city in the Adriatic, Dubrovnik, where I was this past July. I’m going to draw a picture during this blog that I hope will leave you yearning for our next post where I will show you how to prepare a traditional Croatian Peka that’s been prepared in the same way for centuries, where we’ll be using the Fornetto bread cloche. I won’t give too much away just yet, but continue reading and you’ll have a very good idea about where our next blog will take us. Enjoy!

There are places on Earth that are well worth taking the time to travel to and Dubrovnik is one of those places indeed. This beautiful city, nestled on the coast of the turquoise Adriatic Sea is built on the side of a mountain which gives you spectacular panoramic views from almost everywhere. Once a tiny republic of it’s own it is now a UNESCO world heritage site in Dalmatia, Croatia (Republika Hrvatska) which once formed part of the former Yugoslavia.

One of the best preserved medieval walled cities in the world, Dubrovnik is absolutely abundant with culture, fantastic architecture and culinary delights to please even the most finicky of palates. It is a small city with only about 42,500 inhabitants yet is one of the most prominent tourist destinations in the Mediterranean. A fun fact about Croatia is that the modern day necktie worn today, came from the “cravat” worn by Croatian soldiers in the 17th century.

The city of Dubrovnik has always been a place that’s been under scrutiny from outside forces and since it’s existence has gone through many transformations and attacks. Thanks to it’s immense wall of roughly 2 kilometres (1.24 miles) long that surrounds the city, it has always been able to come out victorious, including the most recent attacks in the 90’s after Yugoslavia split into several different countries including Croatia. After the shell attacks ended the city rebuilt following UNESCO’s guidelines as a world heritage site, staying true to the ways of yesteryear and the city is truly breathtaking!

Dubrovnik and the Dalmatian region isn’t beachy, it’s rocky and cliffy much like many other parts of the Mediterranean where the mountains flow into the sea.

Bougainvillaea grows abundantly and spreads like wildfire throughout Dubrovnik, clinging to the sides of buildings and growing over arbours and fences sharing space the ivy. Vibrant splashes of purple, mauve, pink and green are everywhere and it seems impossible to be unhappy. Not to mention the sun and pure blue skies!

From atop the wall, which is completely walkable from one end to the other, the roofs of Dubrovnik are interspersed with old and new from the rebuild. The island off in the distance is Lokrum, a national park that I had the opportunity to visit. Surreal is one way to put it when the peacocks that were imported ages ago flourish and eat out of your hand.

The inside of the city is absolutely astonishing. Medieval architecture at its best. The stone streets are so old and heavily walked on that they are shiny enough to reflect the passers-by. That being said however, it never feels crowded!

Though regional Dalmatian cuisine itself was heavily influenced by Italian and other Mediterranean cuisines featuring lots of seafood, cooked vegetables and pasta, national Croatian cuisine on a whole is far more broad, adopting dishes and cooking techniques from neighbouring Hungary, Austria, Slovenia, Bosnia Herzegovina, Serbia and Montenegro and was heavily influenced by Turkish cuisine during its Vassal state under the Ottoman Empire. Croatia in fact is listed by UNESCO as one of the 7 countries where the Mediterranean diet is an intangible cultural heritage.

The farmer’s market is in a small square and is an actual FARMERS market, where local farmers come to sell their wares.

The produce throughout the Mediterranean is fresh beyond anything I’ve ever seen. The flavour of a tomato or pepper that was picked under the sun that morning can’t be beat!

The chard, beans and the cucumbers are unlike anything you can buy at the grocery store!

Now, I mentioned the traditional Croatian Peka earlier and what it is is a large, round cast-iron dish with a matching dome in which a variety of meats and vegetables are cooked on the floor of a wood-burning oven. I tried my utmost to buy one but it’s virtually impossible. Not only do they weigh about 20 kilograms (44 pounds), but you can’t find them in stores either. They are traditional and mostly made by artisans who sell them during summer fairs. So we will be recreating a traditional Peka dish in the next blog in the bread cloche, which is very similar in size and shape.

As I mentioned, Dalmatian cooking has been influenced by many different cultures and the aspect of the smoked meats and cheeses appealed to me the most. Bacon, ham hock, loin, meatloaf and local cheese, all smoked. Sensational!

Croatians are also great producers of cured and smokes sausages. We will making cured and smoked sausages from scratch shortly in an upcoming blog as well.

What I liked a lot about the cooking in Crotia is their non-shyness when it comes to the use of herbs and spices. They infuse salt with everything, from rosemary to turmeric and thyme to lavender, the latter of which I have to say is absolutely amazing on lamb! They’re also proficient wine and olive oil makers and even make salami out of figs like the one in the image. Amazing with wine and cheese.

Like most countries in Eastern Europe, Croatia has a very very vast assortment of brine-cured and pickled accoutrements. Inspired from as far north as Russia to as far south as Turkey you can bet your bottom dollar that they all go great with smoked meats and Peka!

I look forward to showing you how to prepare and serve a traditional Croatian Peka in next week’s post.

You’re in for a treat. Enjoy!

Spain’s Iconic Paella

When one thinks of Spain, images of Flamenco dancers, castanets, toreadors and running bulls may come to mind. For foodies however, the images are probably far more geared toward rich and full-bodied wines, a cornucopia of tapas and of course, Spain’s most renowned dish, Paella.

Paella is a rice and seafood dish from Spain’s Valencia province on the Mediterranean coast. It’s considered by food historians to be a perfect example of the union of Roman culture that brought with it the tools needed to make Paella and the North-African culture that for centuries has been considered to be the most influential contributor to Spain’s early food supply.

Outside of Spain, it is thought to be the national Spanish dish however, because Spain is made up of so many different and distinct cultures that settled in various regions, inside Spanish borders it is considered to actually be the regional dish of Valencia.

There is the traditional Paella Valenciana which consists of rice, white meat like rabbit or chicken, snails (escargots), beans, and at times artichoke hearts and chicken livers.

Saffron is the trademark spice that’s used in all Paellas and it’s from the saffron that Paella takes on its vibrant yellow colour.

Paella de Marisco (Seafood Paella) is prepared in exactly the same manner as the Paella Valenciana but replaces all meat with crustaceans and other seafood and is most often prepared without the addition of vegetables.

These are two types of Paella that follow a more rigid preparation leaving little room for creative licence. My personal favourite, Paella Mixta (Mixed Paella) leaves lots of room for creativity and you can virtually add anything you like to it.

In this post, I’m going to show you how to prepare a Paella Mixta starting off in the traditional manner which is on a stovetop, outdoor burner, fire or grill and then finishing up non-traditionally in the Fornetto. I’ll also show you a “meat-lovers” type of Paella prepared in a one-step cooking style and done entirely in the Fornetto.

As I mention in almost all of our posts and without wanting to sound repetitious, use the freshest ingredients you can buy you can buy! When making a Paella with seafood, try to buy fresh but if you need to, you can always use frozen. Be sure to defrost anything properly in the refrigerator. Never leave anything sitting out on the countertop to defrost.

If making a meat-based Mixed Paella, try using typically Spanish ingredients such as Chorizo, and a dry-cured Spanish ham such as Jamón (ham) Ibérico.

As I mentioned earlier, I’ve prepared two Paellas for this post using a two-step method for cooking one and a completely non-traditional method for the other. Now to explain why. In the above image, I used a stainless steel Paella (in Valencian) or Paellera in most other Spanish speaking regions and countries. It’s the traditional dish used for making Paella and is wide and relatively shallow. Normally, Paella is completely cooked over an open flame, either indoors or out. In the above Paella Mixta de Marisco (Mixed Seafood Paella) I began on the stove and finished it off in the Fornetto.

In the above, our Meat-Lovers’ Paella, everything is prepared in the ceramic Fornetto roasting dish though there’s a method that I will show you in the following video and in the recipes in order for your rice to cook properly so that you end up with a Paella that is dry enough for the grains of rice to separate yet that’s still juicy and flavourful. The trick with Paella is to get your measurements right or you can end up with under-done rice or a mushy and cluggy mess. (It’s very important to note that ceramic dishes such as Fornetto’s line of ceramics should never de used over an open flame or in contact with any direct heat sources such as those from a gas range or electric, induction or halogen stovetop). Watch the video below to see how I’ve put both Paellas together.

For the Seafood Paella, all you need is a bit of freshly chopped parsley and a generous sprinkling of fresh lemon and dinner is served! Seafood Paella is always served with the seafood still in their shells which makes eating it a bit messy.

Follow my seafood prepping demonstration in the video to make Paella easier to eat for both you and your guests. Click here to get the recipe!

Juicy and bursting with flavour, the Meat-Lovers’ Paella delivers what a traditional Paella offers in terms of a delicious single dish meal and is a great alternative for guests that prefer meat over seafood or that may be allergic to shellfish. For a vegetarian alternative, try loading up on vegetables and replace the chicken or fish stock with vegetable broth! Click here to get the recipe!

You’re in for treat. Enjoy!

Salad Compilations Part 1

It’s wonderful having a Fornetto and truth be told, you’ll want to serve delicious things to accompany the masterpieces you’ll cook in it. That’s where this series of posts come in!

I like creating posts that bear the same title that allow me to build up a certain repertoire within a series. So I’m creating multiple blog posts with one title for any subject that can’t be summed up in one post. That’s why this is the first entry under the title of “Salad Compilations”.

Before moving abroad a number of years ago, I owned a small bistro in Montreal, Canada and each of the salads in this post were on the menu. The first is a Tuscan Panzanella (or Panmolle) that I fell in love with at a small Italian restaurant in Florence, I’ll explain it below. The next is inspired by a fantastic florist I know who would bring this salad to work religiously and if I happened to be at the florist at lunchtime, she’d share (she really had no choice though!). There surely are many variants of both of these salads but these are mine. The great thing about salads is that they’re versatile and allow for creativity and change. The last is my great grandmother’s recipe, with nothing changed by me! Why mess with the best? Though it should be kept a family secret I feel that I’d be keeping something delicious from you all!

The importance of a good quality extra virgin olive oil is paramount to all of these salads as the dressings are very light and in one case, the only extra liquid added to the salad is olive oil. So, make sure you have a good quality one. How I dress the Panzanella salad with oil and vinegar is very Mediterranean; by eye. Start off sparingly at first, taste and add more if need be. You can always easily add more oil, vinegar or salt however, removing them from the salad once you’ve added them is virtually impossible. See below for all of the ingredients.

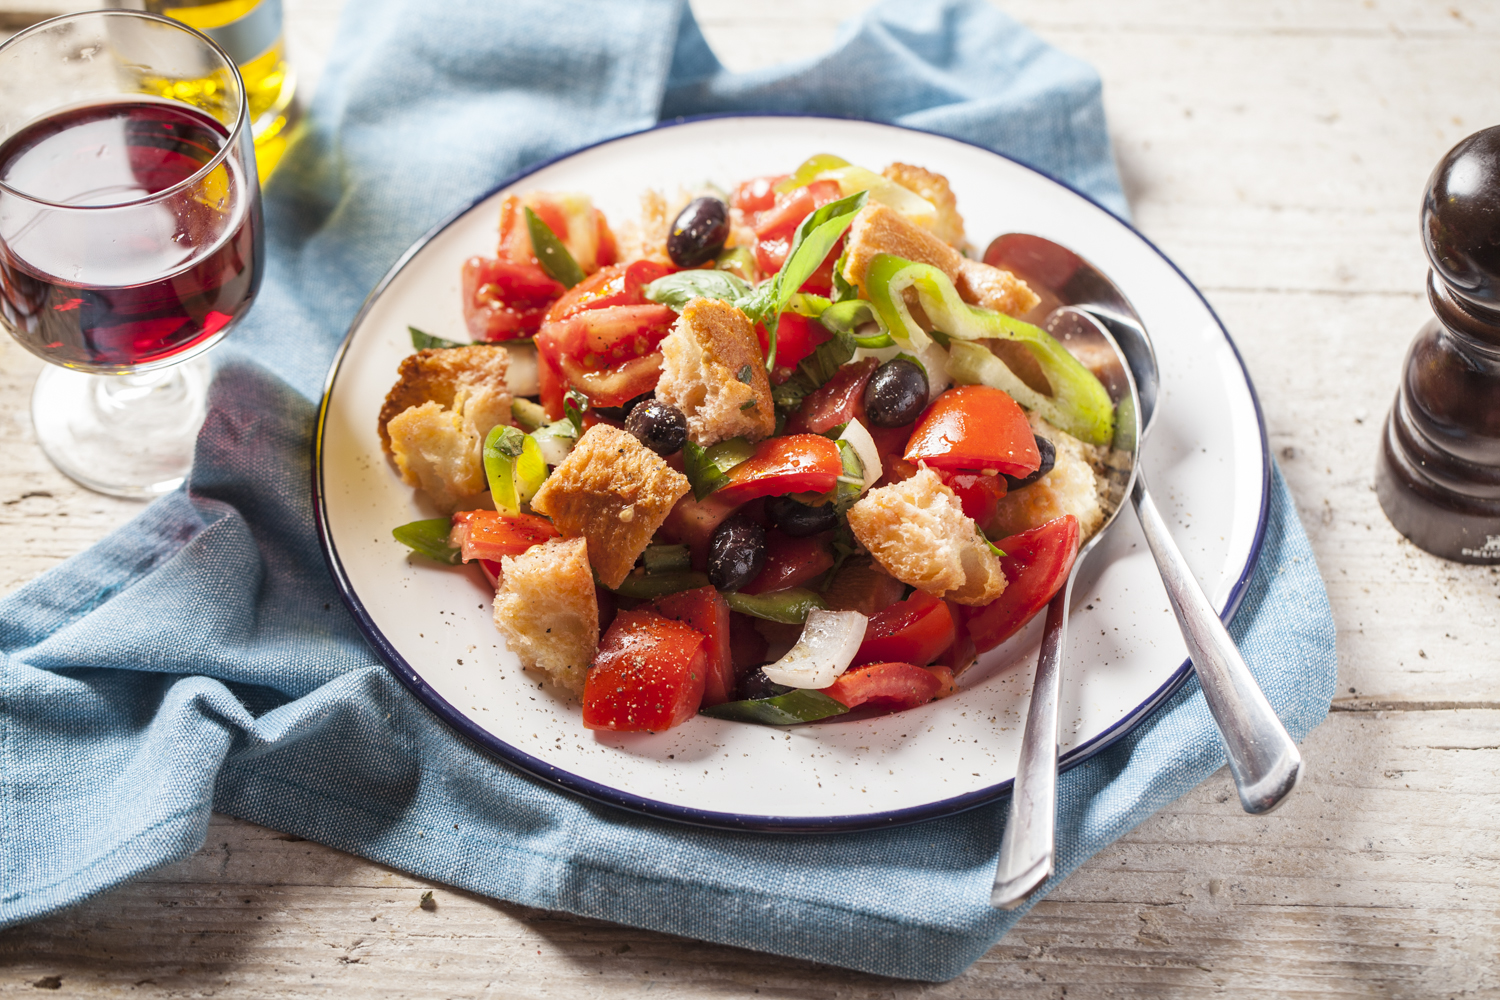
Panzanella is a salad that’s made during the summer in Italy’s Tuscan region. Using day-old bread that has had a chance to go stale (which I might add is not a bad thing when you know what to do with it) this salad is rich in flavour and freshness. The best part is that the bread slowly absorbs all the juices given off by the tomatoes as you’re eating it without going all soggy and mushy like fresh bread would. It’s a treat of a salad full of fresh basil, olives, green onions (scallions), sweet onions, sweet peppers, extra virgin olive oil and red wine vinegar. For this salad, serve any ratio of the ingredients you like (making sure there are lots of tomatoes) mixed in a bowl and dress it to taste using the extra virgin olive oil, a red-wine or sherry vinegar, sea salt and a generous grinding of fresh black pepper. Toss the salad well and you’ll see that the tomatoes will start releasing their juices and will coat the bread along with the olive oil and vinegar.

The next on our list comes from a florist friend of mine back in Montreal; Ginette. This salad is hearty yet refreshing and is ideally served paired with fish or poultry cooked in the Fornetto for a light dinner.

This recipe requires a tiny bit more work as the dressing should be made ahead of time and allowed to sit but it’s as simple as pie! Slice one clove of garlic into thin rounds and place it in a clean empty jar with a screw lid. Make sure the jar is big enough to accommodate 375 ml (one and a half-cups of liquid). Start off by adding 125 ml (a half-cup) of white vinegar or red wine vinegar and one teaspoon of salt and mix to dissolve. Allow this to sit for about 1 hour to allow the garlic to infuse. Once that’s done, add 250 ml (one cup) of extra virgin olive oil to the mix, close the jar tightly and shake vigorously. If you wish, you can also add in a teaspoon of dijon mustard to kick things up a notch.

It’s important when using avocados to cut them close to the time that you’ll need them because if they are subjected to the air without an acid on them (like vinegar, lemon or lime for example) they will oxidise and turn black quickly. Slice hearts of palm into rings, artichoke hearts into wedges and cube the avocado. You’ll want equal parts of all three. Add an ample amount of fresh basil and a couple of pinches of dried oregano and toss gently to mix. Dress lightly with the vinaigrette and serve on top of a bed of greens with a generous grinding of red peppercorns. Serve with extra dressing on the side and refrigerate any that’s left-over.

This next salad takes us deep into the heart of Calabria in the south of Italy. Whether this salad is actually known outside of my great grandmother’s village of Ardore beats me however, it should be! I can still remember her making it when I was a kid. She always made it with fresh garden tomatoes that were still warm from the sun. This delicious and farm-simple salad still takes me back to my childhood and is an irrefutable family favorite.

This salad requires that you know how to boil potatoes to the fine-line point between under and overdone. They need to be firm enough that they don’t turn to mush when you toss them yet soft enough that they don’t crunch when you bite into them. You should be trying them constantly while they’re cooking (they’re delicious when they’re hot with a bit off butter and black pepper on them!). Make sure that they have the right consistency and when they’re ready they should be run under cold water immediately to stop any further cooking. Use any variety of new potatoes that you like. A tip for boiling new potatoes without having them burst open has to do with the amount of salt in the water. It’s a ridiculous amount but don’t worry, potatoes cooked with their skins on absorb very little salt. Use about 135gr (half-cup of salt) for every two litres of water.

When the potatoes are cooked, cut them into bite sized chunks, halving them is normally sufficient. Chop sweet onion into pieces and separate them into individual laminates. Cut the tomatoes into the same size as the potatoes. When done, there should be equal portions of potato and tomato. Tear a few fresh basil leaves into small pieces and add it into the mixture. When using fresh basil it’s important to tear it and not to cut it. This will avoid it turning black and will release even more flavour. Pour over a generous amount of extra virgin olive oil, a good amount of sea salt (don’t worry about it being too salty, the extra salt helps to flavour the potatoes as they will have absorbed very little salt during their cooking), and freshly cracked black pepper.

You’re in for a treat. Enjoy!

Perfect roast beef every time!

Roast beef is one of those dishes that’s virtually impossible to cook to perfection but not because of the degree of difficulty! In fact, roast beef is quite easy to cook. What’s difficult to satisfy are individual tastes because some people like it very rare and some like it very well-done, making it hard to cook a roast beef to suit everyone’s personal preferences. I find however, that if you cook it to a medium-rare centre temperature of 60-63C (140-145F) it will continue to cook after it’s been removed from the oven to a perfect medium which is cooked well on the outside and perfectly pink and very juicy on the inside; between “À point” and “Cuit” which everyone can enjoy.

In order to prepare your idea of perfect roast beef in your Fornetto cooking product, here’s a guide to internal temperatures according to doneness. Always bear in mind that when the roast is removed from the oven it will continue to cook toward the centre of the meat. If you won’t be serving it immediately but will be allowing it to rest before serving (which I suggest as this allows for the juices in the meat to redistribute throughout the roast), be sure to lower the temperatures by approximately 3-5 degrees centigrade for each level of doneness as it will cook to your preference while it rests (for a minimum of 10 minutes, tented under foil).

Internal temperatures for beef doneness:

  • Rare: 52-60C (125-140F)*
  • Medium rare: 60-63C (140-145F)*
  • Medium: 63-67C (145-153F)*
  • Medium well:  67-71C(153-160F)*
  • Well-done: 71C (160-170F)*

As a rule of thumb, it’s pretty safe to say that roast beef cooks to the desired doneness by cooking it at 180C (355F) for 20 minutes per 450gr (1lb) plus 20 extra minutes for rare, 25 minutes per 450gr (1lb) plus 25 extra minutes for medium and 30 minutes per 450gr (1lb) plus 30 extra minutes for well-done. I suggest however, that you use a digital thermometer for the best results as roasts are variable and will cook at different speeds depending on the cut, size and shape. If you are making a bone-in roast, keep the thermometer away from the bone as it conducts heat and will give you a false reading.

For the roast as I’ve prepared it here, the following is your shopping list. A 2kg (4.4lbs) boneless beef roast, 2 eggplants, 2 onions, 2 red bell peppers (capsicums), 450g (1 lb) new potatoes, flat leaf parsley, 2 cloves of garlic, extra virgin olive oil, black pepper, crushed red chilies and salt to taste.

Begin by washing all the vegetables and peel the new potatoes (if you wish) and the eggplant. Cut the eggplant and peppers into strips of about 1 cm (0.4″) wide and slice the onion into rings. Reserve about a quarter of each of the vegetables except for the potatoes for the next step. Mix the remaining vegetables with a good amount of olive oil, about 3 tablespoons and salt them generously.

With the extra vegetables you reserved from the first step, chop them into small cubes. Add to the them two cloves of garlic, about 1 tablespoon of finely chopped and well-packed flat leaf parsley, crushed red pepper (to add the degree of spiciness you like), a drizzling of olive oil and salt and pepper to taste. Using a mortar and pestle, crush everything together until you have a very coarse mixture. Do not blend it into a paste.

No matter what size roast you purchase, you can always be sure of its doneness by the internal temperature in the middle. If you have a good butcher, or are handy in the kitchen, I suggest buying or preparing a roast that’s wrapped in fat and that has been strung together with kitchen twine. In general, roast beef is usually quite lean and the fat protects it while it cooks and keeps it from drying out. If you look very closely between the beef and the fat, I rolled the roast in finely cracked black pepper before tying the strips of fat to it. This will add lots of peppery flavour to the meat as it cooks. With the spicy mixture we’ve made, apply a stripe along the top of the roast. As the roast cooks and as the mixture warms, it will mix and flavour the fat that will baste the roast as it slowly melts down its sides. Don’t concern yourself with the mixture burning as it will be discarded along with the twine and fat before serving.

In a roasting dish, similar to the Fornetto one below, place the roast in the centre of the dish and pack all of the vegetables in tightly. Don’t worry if it appears as though you have too many. They will all end up fitting as the whole thing cooks and the vegetables begin to fall.

Preheat the Fornetto oven, kamado or smoker (or a conventional oven) to 180C (355F) and place a rack into the oven so that the roast is centred.

What’s great about digital thermometers is that you can leave them in the roast as it cooks and you’ll be notified when the centre has reached the temperature you’ve programmed. Having programmed my roast for medium-rare, after allowing it to rest for 10 minutes, the result was a perfect medium with a juicy, pink centre.

Remove the roast when it comes to temperature and tent it with aluminium foil. I also place a dry towel over the top of the foil to keep the heat in and allow the roast to come to the degree of doneness I’m targeting.

Unlike a steak, slice roast beef thinly as it’s best served that way and creates lots of surface area for the gravy. Be sure to remove the twine and fat from the outside of the roast before serving.

Serve the roast with a generous helping of the potatoes and vegetables that roasted alongside it. You’ll notice that when preparing a roast in this manner, with vegetables such a those that we used here, they will give off lots of delicious liquid that’s ideal to spoon over top. Save all the leftovers as the meat is very tasty cooked this way and makes excellent unconventional roast beef, veggie and (spicy) pickled pepper sandwiches which are great to take to school or work for lunch with some of the potatoes on the side.

You’re in for a treat. Enjoy!

*The cooking temperatures in this post are based on cooking techniques for optimum doneness for fresh beef. If you are concerned with food-borne illnesses, health authorities recommend a minimum of 63C (145F) which was done here for medium doneness for completely safe consumption.

Sauerkraut….the ultimate accompaniment

In this post I’m going to show you just how easy making your own homemade sauerkraut is and then a great and easy recipe for how to cook with it using your Fornetto!

For those of you familiar with Sauerkraut, you’ll know that it’s a food that has gone through the process of fermentation. That’s what makes it sour. Many people think that fermentation is connected to rotting and although certain bacteria are used to ferment, namely different species of lactic acid bacteria, fermentation for consumption is achieved in a controlled manner that allows the food to be broken down, soured safely by the lactic acid created by the bacteria and preserved naturally without the need for any added chemicals.

The result is an exceptionally healthy food, full of probiotics, that is easy to digest as enzymes and proteins have been partially broken down and the bacteria that did the job make up a huge part of the beneficial flora in our digestive systems. Once people understand that many of the foods that they eat on a regular basis have been fermented (also referred to as cultured) such as kosher dills,  yogurt and hundreds of other dairy products including cheese, opinions often change about fermentation.

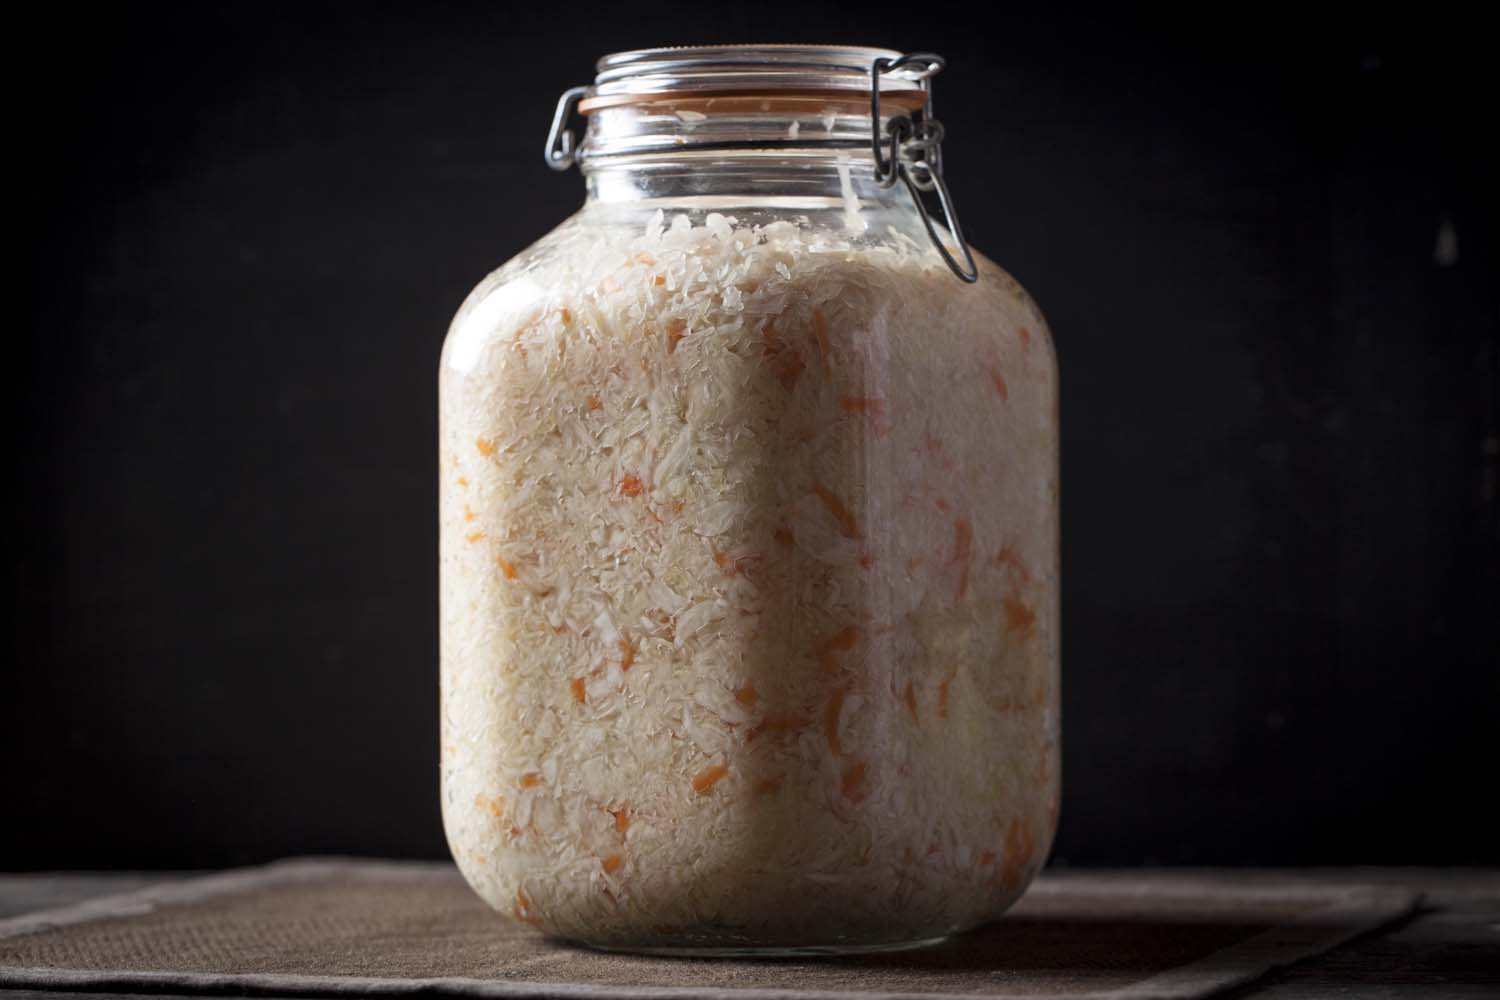
Here’s what you’ll need to make your own Sauerkraut. Cabbage, carrots if you like and salt. That’s it, that’s all. It really is that simple.

I always use a jar with a narrow neck, clip-style lid and gasket but feel free to use a wide-mouth mason-type jar, crock pot or barrel if you prefer, it all depends on your preference and the amount you’re making. When fermenting any vegetable, the golden rule is that it be kept away from any air until it has completed the fermentation process, at which point it can be kept in the refrigerator for several months. The way in which the cabbage is kept away from air is by keeping it submerged under its own juices. If you use a narrow-necked jar, you can simply push all the cabbage down forcing the liquid to the top and using a clean plastic bag filled with a bit of water, fill the neck to prevent the cabbage from surfacing (as you’ll see in the video) or you can weigh everything down using a plate and a stone if you’re using a vessel wide enough to do so. It all depends on the container you choose but I find the narrow-necked jar method the easiest. Scroll down to the bottom of this page to view the video demonstration or click here to read the method.

Whether you’re going to make the Sauerkraut yourself or buy it, below is a simple and delicious way to create a Sauerkraut based dish to cook in your Fornetto with lots of smoked meats that is sure to please any lover of smoked food. Be sure that if you are going to buy the Sauerkraut, to purchase one that hasn’t been spiced or prepared with wine.

As I mentioned, this dish is really simple and it’s often the simple dishes that have people coming back for more and more. This recipe is no exception and in fact it’s less of a recipe than a manner in which to prepare Sauerkraut.

You’ll need a good amount of Sauerkraut to line the bottom of a roasting dish thickly, mixed with bacon and red currants (fresh or frozen), doused with a good white wine like a Riesling and laced with dry mustard seeds. The amounts you use are completely up to you and besides using too much wine, which would make it too “liquidy”, you can’t really go wrong. The Sauerkraut mélange is then topped with any variety of smoked meats (preferably smoked in the Fornetto previously) such as a mix of smoked sausages, chicken, pork chops, ribs or turkey. Anything smoked works perfectly for this dish, though I would steer clear of smoked fish prepared in this manner as the humidity from the kraut will make the fish soggy. If your preference is fish, you’re better off preparing the Sauerkraut alone and serving it alongside smoked fish and potatoes, as potatoes are a more traditional accompaniment to smoked fish.

The way to cook this dish isn’t to heat it enough to bring it to a roaring boil as the meat and Sauerkraut are ready to be eaten as they are but rather to simmer it well enough that the alcohol from the wine evaporates, to allow the bacon and berries to infuse their flavours and to ensure that the mustard seeds plump up nicely. Ideally, if you have smoked the meats you’ll be using, you’re Fornetto will already be hot and it will be a cinch to bring it up to 170C (340F) to prepare the dish. Heat it covered for the first 30 minutes and uncovered for a further 30 minutes to allow the extra liquid to evaporate.

Serve the Sauerkraut and smoked meat medley directly from your roasting dish.

Serve it with beer, spicy mustard and horseradish on the side. This is a very hearty dish as it is, though if you’d like to serve a starch along side I suggest crusty bread or fries, but believe me, you probably won’t need to!

Serve it with beer, spicy mustard and horseradish on the side. This is a very hearty dish as it is, though if you’d like to serve a starch along side I suggest crusty bread or fries, but believe me, you probably won’t need to!

You’re in for a treat. Enjoy!

A cool note about Sauerkraut: Anyone taking antibiotics can benefit greatly from eating fermented/cultured foods as they naturally replenish the good bacteria in our digestive system that has been killed off by the antibiotics, which unfortunately, kill both beneficial and harmful bacteria.

Mushroom picking!

I love this time of year! After a hot summer, the weather is now beginning to cool off and it’s time to start thinking about pickling or fermenting your vegetables, curing your own meat and sausages and of course, picking nature’s “spory” little wonders that start growing amongst the bed of fallen leaves and pine needles that now make up most of the forest’s ground cover. All it takes is for the temperature to drop by just a few degrees, a few good rains and lo and behold………..wild mushrooms are in abundance!

Last week, we planned an excursion out of the city and into the fresh mountain air to scavenge for these beautiful and tasty delights. A strong word of caution however! If you have never been mushroom picking before, and aren’t familiar with wild mushrooms, take a good reference book with you so you can identify what you’re picking, take someone that’s in the know, ask people in a village or town nearby if you aren’t sure about what you’ve picked and NEVER eat anything you aren’t 100% certain about! I’m not a wild mushroom connoisseur by any stretch of the imagination and it’s important to leave your “I know everything” cap at home. Because mushrooms never grow in exactly the same way, and some toxic ones mimic the edible ones, be sure you know what you’re doing. I was really glad that we visited a nearby town where a very nice woman sorted through what we picked and turfed about a quarter of them!

That being said, and following those simple rules, mushroom picking is absolutely awesome. It’s a great chance to get out of the city (if you live in the city that is), breathe in the fresh air, and hike though the forest. Kids love it as well and are completely unaware of the educational value; an added bonus and surely something worthy of show-and-tell!

For this particular post (and recipe) we collected wild mushrooms that not only grow near to us in abundance but that are also available cultivated and sold in many specialty fruit and vegetable stores and grocers around the world. Truth be told however, you can feel free to use any type of wild mushrooms you prefer but don’t substitute dried/reconstituted mushrooms as this will alter the flavour of the dish greatly, if need be, use jarred or frozen. Mushrooms are interesting in this respect as dried mushrooms vary greatly in flavour to fresh ones. Another good example of this are sun-dried tomatoes versus fresh ones who’s flavours are completely different. Above is a photographic list of the mushrooms we picked.

Now that we’ve looked closer at the types of mushrooms we picked here and their distribution geographically (bear in mind that the above mushrooms can usually be found cultivated and sold fresh at your local specialty grocer), try to plan a trip to the forest to experience the invigorating feeling that comes with being in nature and picking your own mushrooms! If these varieties aren’t available to you, do some research and find out what edible mushrooms grow close to you and like I said, go right ahead and substitute the ones I used here for the ones that are available to you. If need be, use white/button mushrooms or any any other locally grown variety(ies) from your grocer.

With mushrooms as the focus of the dish I’ve prepared for this blog, let’s take a look at the wild mushroom cannelloni below and what you’ll need to prepare it!

Here’s the shopping list (the quantities are in the recipe). Wild mushrooms, lots of them! Thyme, rosemary, fresh tomatoes for your own tomato sauce or your favourite “passata di pomodoro”, béchamel, ground beef, veal, pork or a mix, ricotta, mozzarella, white wine, salt, pepper and of course the pasta. I also used an onion as I love the flavour of onion and mushrooms together. The pasta for cannelloni is sold in two ways, tubes which you stuff or sheets, similar to those for lasagne that you roll around the stuffing. The choice is yours but be sure to check out the video!

When baking the cannelloni, start off by baking it covered on a rack positioned close to the bottom of the Fornetto oven. You can also cook it beautifully in a conventional oven or a Fornetto smoker or kamado!

After they’ve baked covered, remove the foil and place them onto a rack positioned as close to the top of the Fornetto as possible. This will help brown the cheese.

Once fully browned, they’re ready to go!

Perfectly baked and scrumptious; you’re guests will come back for seconds. Guaranteed! Cannelloni also makes a great starter to any meal.

All that’s left to do is to garnish the cannelloni with a fresh sprig of thyme and rosemary, which really accentuates the “woodsyness” of the wild mushrooms, pour a glass of a full-bodied red wine and tear off a piece of crusty bread for sopping up any sauce left over on the plate!

Click here for the recipe!

You’re in for a treat. Enjoy!

Brined, half-smoked and slow roasted turkey

It may be out of your everyday norm but there’s nothing new about smoking a turkey. In fact, turkey has been smoked for generations and there’s no surprise as to why. IT’S DELICIOUS!

Smoked foods of any kind, be they meat, poultry, fish, dairy or vegetable are generally served in small portions as the catalyst on a great sandwich or salad or even as a flavouring for soups and sauces. The fact of the matter is however, that a whole portion of smoked ribs, ham, chops, sausages, fish and yes, chicken and turkey as well, on your plate is to die for. What’s important to bear in mind is the amount of smoke flavour you want to impart to your food when you’re smoking it. If it’s over-smoked, you can easily end up with food that’s bitter from the smoke or so smokey that it over-powers the rest of the meal. If it’s under-smoked, you may not even notice the smokey flavour!

On the same note, the amount of salt is key as well when smoking your food. Check out our original brine recipe below and continue reading for the variation on the brine I used for the turkey.

The difference between our original brine and the brine I used for the turkey is the addition of extra herbs and spices. What’s important to bear in mind is the quantity. A whole turkey is large and therefore needs to be completely submerged while brining it which means that the brine recipe needs to be increased in order for you to have enough to ensure that you have the correct amount to cover your turkey. In order to impart the additional flavour for the turkey brine, I added dried oregano, dried onion flakes, onion powder, cracked coriander seeds and fresh garlic to the original recipe.

Original Brine Recipe:

Ingredients:
6 litres (1.6 US gallons) of spring water or purified water
2 cups of sea salt or kosher salt
1 cups of sugar (white or brown)
3 tbsp of whole yellow mustard seeds (OMIT THIS FOR THE TURKEY BRINE)
2 tbsp of cracked black peppercorns
4 bay leaves, whole (CRACKED FOR THE TURKEY BRINE)
1 onion sliced into wedges
2 apples, sliced

For the turkey brine add:
1 tablespoon of dried oregano
1 tablespoon of dried onion flakes
1 teaspoons of onion powder
1 tablespoon of cracked coriander seeds
1 garlic clove, sliced in half

Make enough of the brine to cover the turkey completely. You will most likely have to double or even triple the recipe. Click on this link to follow the rest of the brine recipe and be sure to dry the turkey completely before oiling, seasoning (without the addition of extra salt) or smoking it.

You can also choose to rinse the turkey once it’s been removed from the brine. This will remove any extra saltiness and depends on your personal preference. Note that I, personally, always brine for short periods (less than 24 hours) at room temperature (in the coolest part of the house) because I order meat that’s been butchered the day of or a day ahead of when I need it. As a salt-brine is a cure, and because of the salt and the temperature at which it will be roasted/smoked you can rest assured that any harmful organisms are killed. Brine your turkey for a minimum of 12 hours up to a maximum of 24 hours. That being said, it’s ABSOLUTELY IMPERATIVE that you use the freshest produce you can purchase. If you are using meat that has been thawed, has been refrigerated for several days or if you are wary of food-borne pathogens, I suggest that you brine in the refrigerator. Avoid smoking turkeys that are larger than 7.25 kg (16 lbs) as they take too long and the increase in the possibility of food contamination rises substantially. If you need more turkey to serve all of your guests, I suggest preparing two. Check out the video below for the process!

Once the turkey’s been brined, it’s time to slow-roast and smoke it. Place the turkey directly on the rack and try to centre it as close to the middle of the Fornetto as possible. You’ll need a drip pan filled with water in the bottom of the oven. This is not only to catch the drippings, but to keep the turkey moist and to help the smokey goodness adhere to the bird.

As I mentioned earlier, the turkey I prepared here is very slowly roasted. A 6 kg (13 lbs) turkey takes about 6 to 7 hours at 110C (225F), of which the first three hours are devoted to smoking and the remaining time is left to roasting. That’s where the half-smoked part kicks in! Fell free however, to smoke it for the entire time using a smooth flavour, like oak. Use a digital meat thermometer inserted into the thickest part of the thigh away from any bone as that will influence the reading and test in several locations. When the temperature hits 75C (165F), it’s time to remove the turkey from the oven and allow it to rest.

Click here for more information about smoking!

Allow your turkey to rest, covered for at least 20 minutes before carving it. This will ensure that the liquids redistribute throughout the meat.

Serve the turkey with your favourite choice of vegetables, cranberry sauce and gravy!

Click here for more information about the Fornetto selection of red wine, cognac and muscatel Oak Barrel smoking chips!

We’d like to take the time to wish all of our friends in the U.S.A. a safe and healthy upcoming holiday. Happy Thanksgiving!

You’re in for a treat. Enjoy!

Minced meats part 2; Chipotle Burgers

It seems to me that these days, the word “Chipotle” is key in quite a lot of recipes! A real catchword or word-of-the-day and rightly so! Chipotle is awesome and it’s no small wonder that it’s in the spotlight and claiming huge renown on the world’s foodie stage. A good friend of mine even makes his own Chipotle and bacon jam! Yum!

If you aren’t sure what a Chipotle is, allow me to explain. Chipotle is a Mexican smoke-dried chili pepper. The variety that’s smoked the most is the Jalapeño pepper however, there are other varieties that are smoked as well, such as Serranos, Habaneros and Hungarian wax peppers. They are used as a spicy flavouring for soups, stews and marinades, among many other uses of course. It offers a full-bodied, earthy, smokey flavour with a medium to medium-high heat level similar to that of Tabasco sauce. Chipotle is sold whole, crushed, powdered, as a sauce and whole in cans in “adobo” sauce.

For this recipe you’ll need Chipotle sauce which you can find in most grocery stores alongside the other hot sauces or in the Mexican food section.

These burger should actually be called “Bacon, Cheddar, Chipotle and Smoked Paprika Burgers” because they are jam packed full of all those good things but we’ll use the shortened name from the main title. Below is your shopping list for the ingredients you’ll need for the Chipotle burgers!

Ingredients: (Makes about 6 large patties or 9 medium)

1 kg (2.2 lbs) Minced lean meat of your choice (Beef, pork, a mix of both or poultry all work well. Make sure the meat is lean, there’s plenty of fat in the bacon and cheese that will keep the burgers moist. Plus, if it isn’t lean, they will shrink down considerably while cooking.)
120 g (4.25 oz) Smoked bacon, chopped very finely
150 g (5.3 oz) Strong cheddar cheese, grated
1 Large egg
3 tbsp Fresh coriander, chopped finely and well packed
3 tbsp Chipotle sauce (or more!)
2 tbsp Yellow mustard
1.5 tsp Whole cumin seeds
1.5 tsp Onion powder
1 tsp Chili powder (the same used for making Chili con Carne)
1 tsp Spanish smoked paprika
0.5 tsp Sea salt

Thanks to our good friend Rick in the USA for the Fornetto burger idea and cooking method that inspired this post. Let’s check out his direct on the grill cooking method below!

Method:

  • Combine all the ingredients in a large mixing bowl and mix thoroughly.
  • Form into the desired amount of patties with your hands or using a burger press (see a previous blog here for more information). If the mixture is too wet you can add some bread crumbs to absorb the extra moisture. This won’t affect the flavour and will help create a stickier mix.
  • Remove the racks from the Fornetto oven and place a drip pan filled with water in the bottom. This will catch the drips and will keep the patties moist while they cook.*
  • Preheat the Fornetto to 200C (390F).*
  • Place the patties directly on one of the racks and when the oven is at temperature, place the rack with the patties into the oven, in the lowest position possible over the drip pan.
  • Cook for about 8 minutes per side or until you reach the desired doneness. Turn only once during the cooking and once turned, toast your buns beside them on the rack.

*You could easily grill the burgers directly on a gas or charcoal BBQ (with the lid on if you have one) or in a Fornetto kamado or smoker for additional smoky flavour!

While the burgers cook, prepare the simple Chipotle slaw! Finely dice and combine half of a small cabbage and half of an iceberg lettuce. Mix in 1.5 cups (375 ml) of mayonnaise, 3 tbsp of Chipotle sauce (or more) and the juice of 1 lime.

Serve the burgers on the toasted buns with slices of tomato, onion, avocado, fresh coriander, the Chipotle slaw and rings of pickled Jalapeño peppers! The cheese and bacon flavour bursts with every single bite and the Chipotle weds everything perfectly adding a touch of earthy smokiness and heat!

Brace yourself because these burgers make a mess while you eat them, but what good burger doesn’t? If you’re having a larger group of people, use both racks and be sure to switch them half way through the cooking process.

You’re in for a treat. Enjoy!

Stuffed for the holidays!

For some of you, Thanksgiving dinner is approaching fast. Here are three delicious Autumnal recipes for you to try on your holiday table this year using vegetables that you may never have thought about stuffing! Pumpkin with a curried beef filling, White Cabbage with a very traditional English flavour and Nappa (Chinese or Wombok) Cabbage stuffed Asian style.

Above are the main ingredients for the three recipes in this blog!

Let’s begin with the technique for hollowing out and stuffing these veggies!

The pumpkin is the easiest and doesn’t need much explaining. Cut a hole in the top to create a lid and scrape out all the pith and seeds using a spoon. Be careful using the knife! You can also use any large squash for this recipe. Simmer the pumpkin in salted water for 30 minutes or until the flesh starts to become tender.

For the white cabbage, begin by cutting off the top at a bit of an angle, like the pumpkin. Pierce through the layers of leaves for the lid with 4 toothpicks. This will ensure that it holds it together. Then, using a shape blade, insert the tip into the core of the cabbage and begin to twist.

Continue twisting the knife until pieces of the cabbage core pop out. When you’ve dug out enough using the knife, scrape away any extra using a spoon.

Scrape out enough of the core so you have enough room for the stuffing and simmer in salted water for about 45 minutes. Don’t over do the simmering or you’ll end up with mush!

For the Nappa cabbage, begin by simmering it first for about 20 minutes in salted water. Do not boil it! Allow it to cool in ice-water and then peel back the leaves. When the innermost leaves begin to crack when you peel them back, you can stop. (For the sake of the images, the cabbage above is still raw in order to demonstrate more clearly the process of peeling it back).

Using a very sharp knife, cut out the raw leaves of the simmered cabbage by slicing through the core.

Remove the raw leaves and the core and reserve them for another meal!

Lie the simmered cabbage leaves (that are still connected to the base) on their side and cupping three or four of the inner leaves, spoon in the filling. When all the filling is in, stand the cabbage back up and tie it off very well with kitchen twine.

Here you have the Nappa cabbage that was simmered first, then stuffed, tied and sprinkled with sesame seeds. Place it in a suitable, greased dish, such as the Fornetto Garlic Roaster dish I used here.

Preheat your Fornetto to about 190C (375F)!

Place the stuffed vegetables on the lowest rack. It is completely up to you but smoking these would be a great variation to the recipes!

Because the vegetables you’re stuffing are par-cooked and the filling is cooked, they only need to bake long enough to finish cooking the shell (like the white cabbage above for instance), to heat the centre through fully and set the egg, which binds the stuffing.

Here’s the pumpkin that was baked for about 1.5 hours. Times will vary based on the size of the vegetable you’re stuffing so keep an eye on it! You’ll notice string around the pumpkin in the image above and the white cabbage below. Do this to avoid the vegetable from splitting open white it bakes.

Both the cabbage and the pumpkin were baked in a greased Fornetto Pie Dish.

Nappa cabbage is far more delicate so I suggest covering it lightly while it cooks. You’ll want nice browning but avoid burning it. If any leaves burn, they can be easily peeled away and discarded before serving.

Because all of the stuffing for these recipes contain egg, the stuffing slices very nicely and doesn’t crumble when you cut it.

Serve the pumpkin as a starter dish accompanied with fresh coriander. To counteract the sweetness of the gourde, serve it with a spicy sauce or chutney. Click here for the recipe!

As I mentioned, the white cabbage is stuffed English style! A variant on “Bubble and Squeak” which is normally left-over potatoes and cabbage from a roast dinner fried up together and usually served for breakfast with bacon and eggs. This has all of that!

Serve it with fried cherry tomatoes and a good lager! Click here for the recipe!

You have a couple of options for serving the Nappa cabbage but I like slicing the top off and serving it whole at the table. You can also serve it sliced. Remember to remove the string before it goes to the table!

Serve it drizzled with dark soya sauce and top off with slices of fresh chilies and green onions! Click here for the recipe!

You’re in for a treat. Enjoy!