Roast Dinner….Not just for Sundays anymore!

Is your life non-stop and always on the go? Not always in the mood to make a full-course meal when you get home from work but there are hungry mouths waiting to be fed nonetheless? If you’ve answered yes then read on because I have you covered in this edition of our Fornetto blog!

Not only is this meal easy, satisfying and nutritious but clean-up is a breeze as well! The Fornetto bread cloche and the baking stone were used here, not just for cooking an entire roast dinner including dessert but for serving it as well.

A complete roast dinner in the cloche, an apple dessert with ice-cream on the baking stone and guess what; the dreaded clean-up after a dinner like this can now be a thing of the past. Not only that but the cloche makes a roast dinner so easy to prepare that it no longer needs to be reserved only for Sundays!


It’s as simple as what you see here for a full roast dinner for 4 from your Fornetto. Choose what you’d like to roast such as beef, chicken, pork or lamb and a selection of seasonal vegetables. Don’t forget your favourite herbs and spices. Click on the link for the recipe.

If you really are too busy to make a homemade stuffing feel free to buy a mix at the store. I’ve kept my recipe really basic with only 4 ingredients and it’s well worth the 5 minutes it takes to prepare! Click on the link for the recipe.

Apples, baked in puff-pastry with pecan crumble topping. Not hard to make and well worth your while after a long day at the office! Click on the link for the recipe.

A large meal on a Sunday afternoon traditionally has it’s roots firmly planted in most of Europe but a roast dinner has been well entrenched particularly in Britain and Ireland. Today, a Sunday roast is common place throughout most of the Anglosphere and many other non-British or Irish influenced countries have adopted the tradition as well. Customarily, in Yorkshire, England, preparing a cut of meat and placing it in a slow oven before leaving for church service in the morning is still done today.

The roast would then be just about ready to eat when the family arrived back home after church and leaving just enough time to prepare the sides. This meal has always been a laborious undertaking as preparing all the sides to coincide with the roast to ensure that everything was still hot when served was no easy feat however, with modern day inventions such as the microwave, heating up side-dishes such as roast potatoes is quite simple. Yet that doesn’t mean that all those pesky pots and pans with burnt bits left behind on them don’t need a good soaking and scrubbing!

What’s unique about roasting in a cloche is that it allows for dry air to circulate. Unlike a stew pot or a tajine that once is filled and the lid is placed over it creates a seal that keeps dry oven air out completely and only allows steam to escape through the top as needed. So how does this pertain to cooking in the cloche and what exactly does it all mean? The bread cloche has a shallow baking dish and a large domed lid of the equal circumference that meets the sides.

Stew pots come with a lid that’s slightly smaller and that’s meant to fit inside the rim of the base. As the meat and vegetables begin to cook inside a dry cloche, steam is created and is condensed inside the lid returning it to the bottom dish, this is where the “jus” will form without the addition of any outside liquids. This “jus” created from the meat and vegetables seasoned with herbs and spices make for an ideal gravy! As the temperature rises more steam is created inside the cloche and is released at the sides as needed.

At the same time, as the steam is circulating inside the dome, hot dry air is pulled through the sides and over the roast and vegetables, allowing them to brown while retaining all of their natural juices. This convection phenomenon does not happen with a dish that does not allow dry air to circulate.

Because of this, the cloche is ideal and succeeds at cooking a roast dinner and making excellent bread, whereas a vessel that seals dry oven air out would fail.

With all of your roast dinner ingredients in the bread cloche simply cook for one and a half hours covered and a half hour uncovered at 170 ℃ (350℉). Roasting times will vary depending on size and type of meat.

Uncovering your roast for the last half an hour of cooking will crisp up the outside of your roast, finish browning the vegetables and reduce the liquid in the bottom to a delicious gravy. You should baste the roast and vegetables at this point and again 15 minutes later. 

Once you remove the roast from the oven, put your dessert in to bake. Remove 40 minutes later when it’s golden brown as above and serve hot, warm or at room temperature.

Quarter chicken leg with stuffing and roasted vegetables from the Fornetto bread cloche. Click on this link for the recipe.

Apple crumble puff pastry tart done perfectly on the Fornetto baking stone. Ready by the time you finish your roast. A dollop of vanilla ice-cream and caramel and you’re in business! See recipe at this link.

It seems to me that the hustle and bustle high-speed lifestyle that many of us lead today, between picking up the kids from school or sports practice and finishing off deadlines at work, has a lot of us out there looking for no-fuss, easy and complete meal ideas. The Fornetto ceramics make cooking, serving and clean-up a breeze. And remember, if you don’t yet own a Fornetto, the line of ceramics are ideal for use in your conventional electric or gas oven as well.

You’re in for a treat. Enjoy and Happy Easter!

Pulled-Pork; Well worth the wait!

There’s something to be said about any appliance that can hold heat like the Fornetto! It’s really amazing that you can cook an entire dinner and then start the next day’s dinner with the residual heat left over; which is exactly what I did.

Perfect pulled-pork cooked overnight only using the residual heat in the Fornetto. A great option when long, slow-cooking is required and there’s no need to monitor or control the heat.

The method is quite simple in fact. When preparing something in the Fornetto that requires a high temperature, such as pizza for example, have the pork prepared ahead of time so as that it’s ready to go in the oven when you’e done making the pizzas. Simply place it in your stew pot, cover it with cold water and season with salt, black peppercorns, bay leaves and any of your favourite herbs or spices; I like dry mustard or mustard seeds but you can use anything as long as you keep with the same flavours that are in your barbecue and “mop” sauce (we’ll talk about those shortly). Be sure to refrigerate it as you want it to go into the oven cold.

Since the cut of meat you are going to be using is very thick, be it a shoulder blade roast, Boston butt or bone-in leg roast, seasoning it at this stage of the game will ensure that flavour reaches the inside of the meat, which will be appreciated by those that don’t like to slather their pork in sauce. For pulled-pork, I prefer the leg (I use a 5 kg / 11 lbs roast that fills the stew pot perfectly) but feel free to use whichever cut you prefer.

Once anything that requires high-temperature cooking is done and your oven is still very hot (around the 350 °C (660 °F)) place a rack in the lowest position and put the chilled stew pot in the oven. Close the door and forget about it for the next eight hours. Overnight is easiest to avoid the temptation of opening and closing the door to check the progress. Trust me, it’ll be fine. If you feel the need, you can place a drip pan in the bottom in case it boils over at any point.

Here’s what you’ll end up with the next day; a small portion of the water will have evaporated and the pork will have very lightly browned on the surface.

It’s at this stage that you’ll want to remove the pork from the stew pot. This is the right time to test that the pork is tender and cooked through. Break off a small piece to make sure that it shreds easily. If not, return the pork in the stew pot to a low oven for further cooking.

Be extremely gentle and remove the pork using forks, spatulas or tongs. It often takes four hands as the pork is literally falling off the bone at this point but you want to keep it as together as possible. Heat your Fornetto to 100 °C (210 °F).

Place the pork in a roasting dish and keep it to one side while the oven is heating. Reserve the liquid from the pork for making a delicious French Canadian yellow split-pea soup with bacon and carrots, for example. Just don’t discard it as that would be a crime! 

Now, holding true to any great pulled-pork recipe, you’ll want to prepare your “mop” sauce (basting sauce) and your barbecue sauce. There’s of course controversy over what sauces should be used on pulled-pork depending on where you’re from however, these are my sauces and can of course be substituted with whichever ones you may prefer, there’s nothing written in stone here. Recipe for the mop sauce is here.

Using a cotton bottle mop or a basting brush, ensure that the “mop” sauce covers all the meat and place it in the hot oven, basting it every 20 minutes or so for about an hour and a half to two hours. Don’t move any pieces that have broken away, baste them as is and let the marinade and flavours infuse into the meat.

When the pork is back in the oven, you can decide at this point whether or not to smoke it as well. I personally love the smokey flavour so I smoke mine for the entire two hours. As I’m demonstrating a way of preparing pulled-pork using the residual heat in the Fornetto versus the long, low-temperature smoking method, I don’t want to miss out on any of the smokey flavour the oven can deliver.

You’ll know it’s done when it’s a beautiful golden brown. A side note about the ceramics; I use these a lot and I have never, ever, in all of my experience, come across dishes that absolutely nothing sticks to and that are as easy to clean. Honestly!

Place it on a chopping block and prepare to start “pulling”! Begin by removing the bone. It will slip clean away from the roast.

Using a couple of forks, simply pull the pork apart. It’ll shred all on its own!

I like using the leg roast for a very specific reason. Similar to a chicken’s light and dark meat, the leg has two different types of meat as well; soft, moist meat similar to the dark meat found on poultry and longer fibres similar to breast meat. This gives your guests the option.

Serve your pulled-pork dripping with sauce and ready for heaping onto a bun………

……or, allow your guests to decide how saucy they’d like it. Click here for my pulled-pork BBQ sauce recipe.

As a personal side note about the ceramics, I use them a lot and other than Fornetto’s I have never, ever, in all of my experience, come across dishes that absolutely nothing sticks to and that are so easy to clean. Honestly! If you don’t own any Fornetto cookware, I highly recommend their line of ceramics.

You’re in for a treat. Enjoy!

Smokin’ Hot Sausages and Homemade Mustard

Sausages have been around for at least centuries and more probably millennia when early humans are thought to have made a basic type of sausage using roasted intestine and stomach; leaving a bit to be desired as far as I’m concerned!

The sausages that we know of today can be traced at least as far back as ancient Greece where a written mention of sausages can be attributed to Homer in his work “The Odyssey”.

The above picture shows fresh sausages that being hot-smoked in the Fornetto. The process is long and slow, this is what ensures a full-bodied and robust smokey flavour. The lower the temperature in the oven and the longer the food you’re smoking is exposed to the smoke, the better. I’ll explain the full technique for hot-smoking below.

These are my fresh sausages (we will explore making fresh sausages shortly in another blog). For the moment, buy sausages that are mild (otherwise known as sweet) as you don’t want the spices they may contain clashing with the smokey flavour you’re wanting the oven to impart.

As I’ve mentioned, the key to hot-smoking anything properly in the oven is the temperature and the amount of time you allow your food to be exposed to the smoke. Let’s first take a look at how to smoke in the Fornetto using the smoker box and our wood chips.

There’s a lot of controversy over soaking your wood chips or not. In my opinion, it does make a difference but not for the reasons you may think. The truth of the matter is that dry wood doesn’t absorb much water except a very small amount over the surface. When you think of an oak wine barrel, the very same barrel the Fornetto chips are made of, wine is not seeping through the wood. The reality is that wood does not absorb water rapidly.

That being said, there’s a very good reason that I soak my chips before placing them in the smoker box. Fornetto’s wood chips are made from oak barrels that have contained three different types of liquids; red wine, cognac and muscatel. By soaking them prior to using them, the surfaces that contained those liquids lightly rehydrate. Once they are placed in the smoker box and put into the combustion chamber, the liquid evaporates before the wood burns. The water that evaporates contains the aroma of red wine, for example, that will flavour your food before the smoke even begins. You’ll want to soak your smoking chips for 20 minutes or so. In my opinion, anything over the 20 minute mark really won’t make much of a difference except you risk leaching the flavour out of the chips and pouring it down the drain! Click here for more information about the Fornetto smoking chips!

Add the moistened chips to the smoker box. Be sure to remove the smoker box before lighting the fire in the combustion chamber. This is really just for convenience at this point as there’s no problem with filling the smoker box while it’s hot however, this way it’s out of the way when lighting the fire.

You’ll want to fill the smoker box to about 3/4’s of the way full. Don’t over fill the box as you don’t want to smother the chips but rather encourage them to smoke. In order for them to smoke properly, they need oxygen.

Place the lid back over the box and wearing your protective gloves, hook the smoker box back onto the door of the combustion chamber and latch shut. Make sure that the smoker slider is open and that the flue is in the “smoke” position. The smoking chips will burn for about an hour or so. If you are going to hot-smoke for longer than an hour (as is the case in this post), be sure to soak your next batch in time to replace the spent chips.

Once the chips are exhausted, if you still want to continue hot-smoking remove the smoker box to a heat/fire resistant surface that you’ve placed close by and allow to cool with the lid off until it’s manageable. Use both hands for removal. When removing the smoker box, practice EXTREME CAUTION AND DILIGENCE as it becomes EXCEPTIONALLY HOT and can easily burn your hands. Keep out of the reach of small children.

Once cool enough to handle, pour the charcoal chips out of the smoker box and onto a piece of aluminium foil for easy disposal. Repeat the process from the beginning if you wish to continue smoking.

As I mentioned earlier, the temperature is key when hot-smoking. High temperatures cook too quickly and won’t allow the smoke sufficient time to impart its flavour. I practice the traditional hot-smoking technique of smoking at around 70C (160F) for a long period; 3 hours and longer depending on the size of what you’re cooking. Smoking at a temperature exceeding 85C (185F) defeats the objective of hot-smoking and converts it to smoke-roasting which in itself is another technique that melts fat and evaporates water too quickly; this would cause our sausages to shrink and split. What we want with hot-smoking is to partially replace the water content of the sausages slowly with their natural fats and to allow them to absorb the smoke flavour gradually. Hot-smoking is a slow cooking method that cooks meats thoroughly over a long period of time at a low temperature. If you’re cooking two levels of sausages, it’s important to switch the racks during the cooking process to allow both levels to cook evenly.

When the sausage has cooked on one side, remove the rack from the oven and flip the sausages over to allow them to brown on the flip side. You’ll notice that I use parchment paper. The reason for this is that I don’t want the skin on the sausage to stick to the rack which would tear on removal resulting in the loss of its juices. When the sausages have browned on both sides (about 3-4 hours at 70C (160F)) remove them from the oven.

The sausages can be enjoyed warm directly from the oven or they make great sandwiches and will keep in the fridge for about 4 days, if they even last that long!

Enjoy them with my homemade old-style grainy mustard and a cold beer. Easy to make and a delicious accompaniment to any smoked sausage. Click here for my homemade mustard recipe.

You’re in for a treat. Enjoy!

The Egg-ceptional Frittata

From simple ingredients come great things! Italian cuisine is based on simplicity with most dishes containing only 4 to 8 ingredients. Italians rely on the quality and freshness of the goods they use in the preparation of their traditional dishes as opposed to the complexity that some other cuisines rely on, such as the Haute-Cuisine of France. Much of (though not all) Italian cuisine falls under the very healthy Mediterranean diet that concentrates on the use of olive oil, many varieties of fruits, vegetables and legumes, unrefined cereals, a high percentage of fish and dairy, and a low percentage of meat.

As simple as Italian cuisine is, for the most part, the frittata sticks to that tradition in its simplicity of ingredients and preparation. Not only that but the beauty of the frittata lies also in its incredible diversity when it comes to flavours and choice of ingredients. Allow me to explain what a frittata is exactly before I go any further.

A frittata is an Italian egg-based dish that is similar to an omelette though it differs in that the ingredients are mixed with the raw egg rather than being placed on top of a partially cooked thin layer of egg which is folded over before serving. It roughly resembles a quiche in how it’s prepared however, it lacks the pastry crust a quiche always has. The frittata probably has the most similarities to a Spanish omelette (Tortilla Española) in thickness and preparation however, the ingredients in a frittata are far more liberal and less traditional than those typically found in a Spanish omelette.

Similar to a Spanish omelette it can be prepared in a deep skillet over low heat and then transferred to the oven once the bottom has set or it can be baked in a pie dish from start to finish, similar to the Middle Eastern egg-dishes known as Kookoo or Ijjeh. The Fornetto pie dish seen in the image is ideal for a nice deep frittata and as is true with all egg-based dishes and baking, the benefit of the non-stick surface of the Fornetto ceramics is ideal. Click on the image to check out the pie dish!

Now knowing that a frittata is an egg-based dish one needs to ask themselves what ingredients they want to use to combine with the eggs for the “egg-cake”. Vegetables, cheeses, meats, and pasta are all variables and the choice is literally up to the person preparing it.

Keeping with a more traditional Italian flavour, one may use Pecorino Romano or Parmigiano-Reggiano cheeses in combination with Prosciutto ham and vegetables. On the flip side, you may choose to adapt a frittata to reflect flavours more traditional to your area by using Sharp cheddar and bacon or blue cheese and leek.

The possibilities are endless however, personally, what differentiates a frittata from any other omelette-type dish is the frequent use of pasta by the Italians. In my family, it was typically made with leftover cooked pasta with a mix of finely chopped seasonal vegetables ranging from Rapini or Broccoli Rabe to eggplant or broad beans and incorporating a strong cheese like Grana Padano and spicy Italian sausage.

Before beating your eggs vigorously, you’ll have to prepare your filling and allow it to cool to room temperature. While cooking the pasta and the ingredients remove the eggs from the fridge to allow them to warm up, as warm eggs beat better than cold eggs. Once the pasta and the veggie/meat ingredients have cooled they can be thoroughly combined and mixed with the beaten eggs.

The frittata should be baked in the Fornetto at 200C (390F) on the middle rack for about 30-40 minutes tented with tin foil for the first 20 minutes to stop browning on the surface.

Remove from the oven and allow to cool on a wire rack. The frittata will slightly shrink and pull away from the sides.

While the frittata is cooling and the oven is still hot, roast your favourite vegetables to serve with the frittata. When roasting vegetables in the Fornetto in this manner I like placing them closer to the top position as the ceiling of cooking chamber acts as a broiler (salamander) really well and roasts from above perfectly.

When the frittata has cooled enough turn it out onto a pie plate and serve in wedges with the roasted vegetables. Click here for my complete vegetable and Italian Speck frittata recipe and preparation method!

Frittatas make an excellent dish to serve warm or at room temperature for brunch, lunch or for a picnic. Since you’ll be baking it in the center of the oven and at a temperature that is ideal for baking bread, you may want to contemplate baking a fresh country bread under the frittata on the baking stone at the same time to serve with it.

You’re in for a treat. Enjoy!

A Day at the Smokehouse

My curiosity often gets the best of me. If I’m able to get professional guidance for something I’m not quite sure about doing, then I go for it! Very fortunately, our food photographer Margaret has some great contacts in the food industry. We managed to setup a meeting and tour with the owner of the Casa Boix (pronounced boy-sh) smokehouse, Jaume who was nice enough not only to give us a full and very in-depth tour of his facility but also let us in on some trade secrets that I’m going to share with you.

In this particular case I was quite interested in learning about how to smoke a whole side of bacon and how to cook the delicatessen style turkey breast they make. Having worked with this particular company’s great products in the past, I knew of their excellent quality and was quite keen on getting the tricks that the professional artisans use and then reproducing what I would learn using the Fornetto.

Step 1. The meat! Be it pork or turkey, the first step is imperative. This is the step where the proteins are broken down and a pellicle is formed. The manner in which it is performed at the smokehouse is by submerging it in a seasoned brine for 4 days, lightly massaging it on a daily basis until the 4 days are up. The salt not only acts as an antibacterial agent but flavours the meat and begins the curing process. The brining breaks down protein chains in the meat, rendering it more tender and ready for cooking or smoking. Once the meat has been prepared, it is hot-smoked or slow-cooked (depending on the end product) to retain the juices and minimise the amount of shrinkage. (Need some more info about pellicles and hot-smoking? See our “Smoking In Barcelona” post)

Step 2. Prepping for the oven. Once the brining process is complete, the meat is then trimmed of any excess fat or skin and is placed in plastic moulds as is the case with their turkey. Their brined pork is placed in metal moulds or muslin to make various ham products.

It takes practice to make perfect and the workers at Casa Boix are real perfectionists! It’s at this stage that the turkey breast seen above is placed in the oven.

When it comes to the ham products, the pork is set into metal moulds or muslin before being placed in the oven.

Once the ham comes out of the metal mould, it is packaged and ready for shipping.

Once the turkey breast is cooked, it can be removed from the plastic film that was holding its shape and can be placed in the smoker for cold-smoking (refer to the end of the post) or consumed as is.

Perfect turkey breast ready for a sandwich! The great thing about preparing turkey breast in this manner is that it’s extremely lean and an excellent source of protein!

Another technique that is used for making ham, more particularly smoked or roasted ham as seen above is to wrap it in muslin. This keeps the shape and allows the smoke to penetrate if being smoked. It also allows liquids to evaporate during the cooking process which makes for a drier style deli meat.

What we will look at in a couple of posts from now is the “how-to” process for making your own bacon and turkey breast deli meat in the Fornetto from scratch.

NOTE: How we prepare our foods prior to smoking has changed significantly. The original process of salting or salt-water brining before smoking pre-cures foods and readies them for storage once smoked. This technique combined with exposing the foods to long periods of hot-smoking, up to several days in fact, ensures proper curing. Although this approach is still widely used, there are three methods that are more commonly used at home:

  • Cold smoking involves cooking the foods first and then exposing them to smoke for flavouring in a relatively cool environment, 20 to 30 °C (68 to 86 °F). This results in foods that are rich in smokey flavour yet retain their moisture. Foods that are cold-smoked must be cooked first as cold smoking does not cook or cure meats, fish or poultry however, it is the technique that should be used for smoking cheese for an obvious reason; its low melting point. (We will examine cold smoking more closely in a future post.)
  • Hot smoking requires the foods to be subjected to moderate heat, 52 to 80 °C (126 to 176 °F) as well as hot smoke which cooks the food at the same time as it’s being smoked. Hot smoking fully cooks the foods ready for consumption directly from the smoker. The moderate temperature not only cooks the food but prevents it from loosing moisture and rendering its fat. This is important for foods that require a certain fat content to remain palatable, such as smoked salmon or bacon.
  • Smoke roasting / baking is any technique where foods are cooked and smoked at temperatures exceeding those of hot smoking. Examples of these are barbecuing over charcoal or wood, tandoor cooking or pit roasting. Since the temperature used for this technique is quite high and cooks very quickly, this method of smoking creates foods with the least amount of smokey flavour.

When smoking cured or raw meat, fish or poultry remember to always allow it to form a pellicle, a slightly tacky (not viscous, unless they’ve been brined) layer of protein on the surface of the food you’re smoking. Times will vary based on if the foods are raw, have been cured or depending on if it’s meat, fish or poultry. A good rule of thumb is to do so uncovered, on a rack in the fridge overnight. Fish, for example, creates a pellicle quite quickly whereas meats and poultry take longer. A proper pellicle on the food that’s about to be smoked is what will ensure adhesion of the smoke and will determine the amount of smoky flavour and colour it absorbs. It equally acts as a protective barrier that will ensure your food doesn’t dry out during the smoking process.

Many thanks to the team at Casa Boix for opening their doors to us at Fornetto and to revealing some of their great techniques!

Lasagna or Lasagne?

The title begs a question that has often made me wonder why certain restaurants and pasta boxes have different spellings for the same thing and quite honestly, until having done a bit of research for this blog I never took the time to look it up. That being said, and being an Italian speaker, the answer’s quite interesting not for its logical Italian grammatical differences, which did make sense to me, but rather for the geographical differences.

Naturally, both words are Italian and as such, the singular and plural forms change as is the case in most languages. In Italian, an “A” becomes an “E” and an “O” becomes an “I” in most cases. Therefore, lasagnE is the plural form of lasagnA just like spaghettI is the plural form of one strand of spaghettO.   

The dish itself in countries other than Italy is relatively young and was introduced by Italian immigrants mostly during the second half of the 20th century. Both the singular and plural forms of the word have had almost the same trajectory and have evolved in virtually the same way on all sides of all oceans. The interesting part is who uses which term and where. In the majority of the world the term “lasagne” is used, whereas in North America, the term “lasagna” usually outweighs its plural counterpart. If you wish to be accurate in your Italian however, the best term to use would be “lasagne” as it’s a dish made with multiple sheets of lasagna.

Traditional lasagne is a simple baked dish made with pasta and other ingredients such as cheese, béchamel and meat sauce although an uncountable number of variations have taken shape since its introduction to other parts of the world. What I’m going to show you here is not the traditional lasagne ascribed to Bologna but rather a common variation including ricotta cheese and mozzarella.

But, enough with the Italian grammar lesson and let’s take a look at what lasagne is. As most of us know, lasagne originated in Italy and is believed to be a Bolognese creation from the region of Bologna. The traditional lasagne is made using sheets of pasta in layers interspersed with béchamel, ragù (both of which we’ll see below) and Parmiggiano-Reggiano (Parmesan cheese). The variations of lasagne are countless the world over, from poultry and game lasagne to vegetarian and even lasagne without any tomato-based sauce!

CLICK HERE for the ragù recipe.

An ingredient we often see in lasagne is béchamel. Béchamel is an easy to make sauce made from a roux of butter and flour cooked in milk and seasoned with salt. When making béchamel it is very important not to darken or burn your roux (flour fried in butter) and to cook it over very low heat. If the roux is dark the béchamel will no longer be white in colour. It’s also important to keep it over low heat when adding your milk and to whisk it continuously, or you’ll end up with a lumpy, curdled mess instead of a smooth, white sauce.

CLICK HERE for the béchamel recipe.

Lasagne rises slightly as it’s being cooked and just wouldn’t be same if it didn’t bubble over the sides. The use of a drip pan in the bottom of the Fornetto oven, kamado or smoker is a very good idea when cooking a lasagne or any other casserole for that matter.

I bake my lasagne for about an hour and 45 minutes at 180C (350F), covered for the first hour and 15 minutes. The mozzarella cheese on the top is only added after I take the foil off otherwise the cheese would stick to it and come off with it once removed. You could use one of our Fornetto ceramics, which cook beautifully and nothing sticks to them! They can even go directly from the oven to the table.

Once the lasagne has baked for enough time and to your liking, allow it too cool slightly so the contents set perfectly before trying to cut it and removing a piece.

Baked lasagne should be enjoyed with fresh crusty bread and freshly grated Parmiggiano-Reggiano, with a glass of wine on the side!

CLICK HERE TO view the full recipe for my lasagne with ragù Bolognese, ricotta cheese, fresh basil and mozzarella.

You’re in for a treat. Enjoy!

Makin’ Bacon……And Smoked Turkey Breast!

You may have read our smokehouse blog about the tour we took around the Casa Boix smokehouse a few weeks ago however, if you missed it don’t fear, click HERE to read it before continuing on with this post as it gives you great pointers for different smoking techniques and tips about smoking in the Fornetto.

What I learnt about making bacon and smoked turkey breast at Casa Boix wasn’t as difficult as I had always imagined it would be. The curing process I’ve created here is my own, based on some independent research I did crossed with the technique I learnt at the smokehouse. As any good business owner, Jaume (the owner of Casa Boix) protected and kept his brine recipe a secret but I came up with one of my own that has a great balance between salt, sugar, water and spices that would please any discerning palate.

A brine is simply a mix of salt and water. Salt water from the ocean is a brine in itself for that matter however, for the sake of flavour, brines used for cooking consist of sweeteners, herbs, spices and even fresh fruits or vegetables. The rule of thumb for a basic salt-water brine for cooking is one cup of salt to 3.75 litres of water (roughly 1 US gallon), although I use a more traditional method involving an egg when preparing my brine for curing. As you may know, buoyancy is elevated in salt water and as such, a tried and true method is having the right salt to water ratio and to mix the salt into the water slowly while a fresh egg in its shell sits on the bottom of the bowl or basin. When the brine is concentrated enough in terms of salinity, the egg will float to the surface. That’s when you know that you’ve added enough salt for a curing brine. To make it easy for you though, the ratio is roughly 3 cups of pure, additive-free and non-iodised sea salt or kosher salt to 6 litres of water (roughly 1.6  US gallons). This is more than a standard run of the mill cooking brine however, because for the purpose of curing, the elevated salt content is paramount. If you will be consuming the bacon or turkey in its entirety in the amount of time you would any other brine-cooked meat, you can feel free to use the less concentrated brine, though for storing meats once they’ve been cured and smoked the brine with the higher salt content must be used. Times will vary greatly. When making bacon or smoked turkey for immediate consumption I recommend brining for around 12 to 20 hours though brining for curing requires more time. What I learnt at the smokehouse is that 4 days is sufficient for most cuts when curing them though you can cure for up to a week in brine without worrying. Be sure to keep it covered in a cool, dark place during the curing process or keep it in the fridge if you’re unsure.

Click here for the brine recipe.

Once the meat has been brined it’s time to smoke it. The turkey needs to be packed in something that won’t melt or burn, such as professional wrap made specifically for smoking and cooking, muslin, cheesecloth or parchment paper. It’s important to use a porous material or the meat won’t absorb the smokey flavour. Be sure that when packing the turkey into the cloth or paper that you attempt to squeeze out as much air as possible. The bacon can be cooked directly as is.

As I mentioned in the smokehouse blog, the humidity level is important when smoking in this manner. Be sure to use a steam bath in the bottom of the Fornetto and to remove it about 2 hours before the smoking process is complete.

The full smoking process takes about 6 hours in the Fornetto. Follow the instructions for hot-smoking in the Fornetto in the smokehouse blog and try your best to keep your temperature around the 70-75C (approximately 160-165F) mark. Bear in mind that the curing process will change the cooking temperature guidelines normally recommended for raw, uncured meat.

Smoked turkey breast and bacon cured and smoked in this fashion are ready to eat as is with no further cooking required. If you’re so inclined, the bacon can be fried to remove any excess fat and crisp it up however, it isn’t necessary. They should be stored in the fridge although it is important to note that unlike smoked goods produced commercially, our bacon and turkey only contain salt and no other additives or preservatives such as sulfites and/or nitrates to preserve the pink colour of the meat or for extended storage periods. I suggest that both the bacon and the turkey be consumed shortly after having been cured and smoked. They can be stored in the refrigerator for up to 7 days or frozen and used as needed.

Nothing beats a turkey-bacon sub, especially when you’ve spent so much time curing and smoking the meat yourself! Fries and a cold beer make for an excellent side!

You’re in for a treat. Enjoy!

Chinese “Char Siu” Style Ribs

Char Siu (叉燒) is a time honoured tradition of slowly roasting meats either on spits over an open flame or in large wood-burning rotisserie ovens. The meat is normally coated in a very flavourful sauce before it’s roasted and the long roasting time gives the meat a deeply rich barbecued flavour. Char Siu is just one type of the largely popular Siu Mei (categorised as any roasted meat) in the Guangdong (Canton) province of China.

The normal cuts of meat used to make Char Siu are boneless cuts such as pork loin, belly, butt (actually a shoulder cut) and neck. The traditional method is to spear the meat on long forks and to roast it in a closed wood-fired oven, similar to the Fornetto or to roast it over an open flame. In fact the name Char Siu translates literally to Fork Roast. Seeing as it’s almost impossible to spear a rack of ribs you can imagine that, traditionally speaking, ribs were not roasted in this manner however, marinating the ribs Char Siu style and placing them on the racks in the Fornetto works like a charm!*

Char Siu spices are a mix of honey, fermented red bean curd, dark soya sauce, hoisin sauce, sherry or rice wine and the infamous Chinese five-spice powder. The addition of red food-colouring is extremely popular but entirely up to you if you choose to use it. I apply the mixture to the ribs a day before I’m planning on cooking them to allow all the flavour to be fully imparted into the meat. As ribs are a tougher cut of meat, they benefit from the longer marinating period.[

When placing your ribs in the Fornetto be sure to place a water bath in the bottom of the cooking chamber. The steam will help tenderise the ribs as they cook. Alternatively, for extremely tender ribs, they can be boiled for about an hour and allowed to cool before applying the marinade. This may benefit anyone that prefers less fatty ribs as well, as the boiling process removes a large percentage of the naturally occurring fat.

Once the ribs start shrinking away from the bones, and much of the fat has dripped into the water bath below, the bath can be removed and the ribs should be cooked further allowing them to brown. A moderate temperature of 160C (approximately 320F) should be observed during the entire cooking process. Remember that the key to cooking really tender ribs in the Fornetto is long slow cooking at a moderate temperature. Be sure that when using the Fornetto to always wear your protective gloves.

In Hong Kong, mainland China and in Chinatowns across the globe, Char Siu is frequently displayed hanging in windows after it has been roasted. It can either be consumed directly at the Siu Mei establishment for lunch alongside another roasted meat and a starch, such as steamed white rice. It can also be taken home and used a main dish for a more elaborate family meal. Char Siu is frequently purchased for use as an ingredient in different appetisers such as Char Siu Bao, a bun filled with Char Siu that is then steamed. It’s also used in various types of Dim Sum dishes. In Southeast Asian cuisine, Char Siu is almost always served as part of a rice dish along with sliced vegetables drizzled with a mix of sweet and salty sauces. Thailand uses it frequently as an ingredient in noodle soups. In the Pacific Rim, and most notably in Hawaii, Char Siu chicken is just as popular as Char Siu pork and follows almost exactly the same ingredient list as the Chinese however, the fermented red bean curd is often simply replaced by red food colouring for convenience. In Hawaii, it can be found cooking in a Imu pit, a traditional Hawaiian underground oven.

Char Siu is becoming evermore popular around the world and as such, different cuts of meat are being prepared “Char Siu” style such as the ribs I’ve done here. In fact, chefs from around the globe and most notably those from around the Pacific Rim, from Australia to California, are using “Char Siu” style meats in their cuisine and creations. It seems the sky is the limit when it comes to meat, poultry and some seafood done “Char Siu” Style!

As I mentioned earlier, in China, whole pieces of Char Siu are often purchased from the Siu Mei and taken home to serve as a main dish with steamed white rice on the side. Feel free to accompany it with any Chinese vegetable such as the flowering Chinese cabbage seen above, in a stir-fry. I always serve my Char Siu with a hot sauce such as Sambal or Sriracha for that extra spicy kick.

Char Siu can be eaten pipping hot right from the Fornetto or at room temperature. When preparing Char Siu meats on the bone remember that they should be cooked through properly. Pork’s safe internal temperature was listed at 70C (roughly 160F) but has recently been lowered to a recommended internal temperature of 63C (roughly 145F) when cooked. Check the recommended guidelines in your country for more information and use a meat thermometer if unsure.

*Feel free to use your conventional oven, kamado or smoker instead of a Fornetto Oven!

Click here for my Char Siu recipe.

You’re in for a treat. Enjoy!

Dehli’s Tandoori Tradition

In last week’s post we explored one of China’s most renowned ways of preparing meat, Siu Mei, Char Siu style. What makes Char Siu so renowned, even if you haven’t heard of it before, is that chances are you will have seen it in a dish prepared in your favourite Chinese restaurant, will have eaten it without knowing it, or will have seen the tantalising lengths of pork freshly roasted and hanging in windows at Asian supermarkets (you can read the Char Siu blog in our blog posts). That being said, India has iconic foods as well, such as a huge range of delectable curries, delicious appetisers like samosas and of course, the infamous Tandoori Chicken which we will be exploring here along with Tandoori Naan bread.

Tandoori Chicken gets its name from the tandoor in which it’s cooked; an earthenware oven in the shape of a cylinder. Though traditionally made of clay they are now available in metal as well. The way a tandoor works is by burning wood or charcoal in the bottom of it. The temperatures inside of a lit tandoor reach exceptional levels of 480C (900F) or higher, making the cooking time extremely quick. The cooking process in a tandoor is interesting as there is no grill on which the meat sits. Different meats and vegetables are pierced onto long metal skewers and are lowered into the tandoor vertically. The cooking happens by a number of different processes; radiant heat from the burning embers in the bottom of the tandoor,  convection by the movement of the hot air generated inside the oven and by smoking created by the fats and juices burning as they hit the embers in the bottom. Breads, such as Naan, Roti and Paratha are cooked on the inner wall of the Tandoor. As the raw dough hits the extremely hot wall of the tandoor it sticks instantly and can be peeled away easily once the bread’s cooked through.


As the Fornetto can hit extremely high temperatures, it can mimic the way in which a Tandoor cooks with convection and indirect heat cooking. Chicken and other meats or vegetables can be placed directly on the racks to cook. A drip pan filled with water should be placed in the bottom of the oven at the beginning of cooking to keep the meat juicy and then removed about 15 minutes prior to it being fully cooked to allow it to brown. Those of you that have ever had Tandoori chicken will know that the meat is seldom very juicy as a tandoor’s extreme heat cooks and dries the meat at the same time. To avoid this when cooking at high temperatures, you have the option of using a water bath with the Fornetto which isn’t possible with many other types of outdoor ovens or grills. I suggest placing the water bath in the oven while it’s preheating, that way, when the meat is placed in the cooking chamber, the water is already steaming. Always remember your gloves and to avoid the steam when opening the door!

As I mentioned earlier, smoking happens to food inside a tandoor as well, not only from the wood or charcoal that is being burnt but by the natural fats and juices being burnt off the embers as they drip from the meat. As you can see in the images above and below, Tandoori chicken is always cooked without the skin. This not only aids with the marinade penetrating the flesh but reduces burning at the same time. For a very authentic flavour, I suggest reserving some of the skin for use during cooking. About 15 minutes into cooking, I place a couple of pieces of skin onto the hot coals in the combustion chamber and open the smoker slider. This will replicate the same smokey flavour imparted by the burning fats and juices inside a tandoor and is similar to the flavour rendered by a charcoal grill. If cooking meats other than chicken, reserve any fat or skin removed during preparation and follow the same technique as above. Go slowly when adding fat or skin as they will flare and increase the temperature inside the Fornetto.

Tandoori chicken gets its rich, full flavour from the marinade and the long marinating time it calls for. The marinade is a perfect blend of spicy, savoury and acidic flavours. Yogurt is mixed with Tandoori Masala spices, a blend including turmeric, cumin, cardamom, and garlic to name but a few and red chill powder for that authentic red colour. Tandoori Masala can be prepared from scratch or purchased already prepared. For a milder flavour, but to retain the red colour, red food colouring is an option.

Tandoori chicken can be served either hot or at room temperature for a picnic. Great accompaniments are basmati (or whole grain basmati as seen above), sweet onion salad, fresh lemon, coriander and Naan bread is a must as we’ll see next. Click here for the Tandoori Chicken and Naan bread recipes!

Tandoori Naan is a traditional leavened flat bread cooked on the inner clay wall of a tandoor. The dough is moderately sticky, similar to pizza dough and is easily removed from an earthenware surface such as clay or the Fornetto pizza stones once fully cooked. The Fornetto Classic Spatula is the ideal tool for Naan, smaller pizzas, buns and other breads. Be sure to lightly flour the spatula before laying the Naan on it so it can be easily cinched off and onto the pizza stone in the bottom of the oven.

The Naan are done when the tops start to bubble and turn brown and toasty. Fresh Naan is often buttered with clarified butter known as Ghee and served alongside other foods from the tandoor, or in this case, the Fornetto!

TIP: You may be wondering about cleaning the pizza stone in the bottom of the oven. I have to recommend against it unless absolutely necessary. The more the stone gets spotted and stained with grease or burnt residue the better it will perform. This is a natural process called seasoning. If you have a truly big mess, simply brush the stone lightly with a non-abrasive brush under running water and allow it to air dry. Never use soap under any circumstance!

You’re in for a treat. Enjoy!

Jerk, not a bad word at all!

When it comes to Jerk, Jamaicans can be proud and hold their heads up high. For such a small island nation, their Jamaican Jerk style of seasoning and cooking has taken root in all corners of the globe, not to mention their rightful place on supermarket shelves!

Everything you eat, no matter where you find yourself on Earth, starts off with fresh ingredients and a willingness to combine them. Jerk is renowned for its delectable spiciness and aromatic flavour, add a touch of smokiness to that from the Fornetto and you have yourself a winning combination.

Whether you prefer to marinate or to use a rub, Jerk has you covered as both work perfectly. Don’t get me wrong, a marinade and a rub will give you very different results both in flavour and colour. Having lived almost nine years of my youth in Jamaica, I can safely say that for me Jerk is a marinade however, as a recipe developer I’ve come up with a Jerk rub using many of the same ingredients that captures the essence of what I know to be Jerk.

Notice the difference in colour and texture of the marinade and dry-rub. The dry-rub shows a greater deal of red from the dried pepper powder whereas the signature blackness of the marinade on the right comes from the moistened black pepper and allspice, as well as the soya sauce I use where others may use molasses. What’s great about Jerk is that there is no “actual” recipe and that most families prepare it differently however, that’s not to say that one isn’t better than another! There are of course, base ingredients that Jerk can’t be without, otherwise it’s just not Jerk. I’ll list them off shortly along with other variants often used.

Be sure to apply a dry-rub only a short time (no more than a half an hour) before cooking as the salt can leach the natural juices out of the meat if applied to far in advance. When applied properly, a rub creates a great crust! A tip when using any dry-rub is that they are best suited to thin cuts of meats or fish that can be cooked quickly, similar to when using a Cajun blackening. A thin cut of meat or fish that’s prepared with a dry-rub will provide flavour in every bite, unlike a thick cut of meat or fish that will only have the flavour on the outside.

When it comes to marinating, marinate for long periods to impart a flavour deep inside the meat you’re cooking and depending on the cut, to tenderise it. I marinate Jerk chicken for a minimum of 12 hours and believe me the results are 100% worth the wait! Although optional, I prefer to remove the skin and score the meat before marinating it with Jerk as this will allow the flavours to be fully infused. Jerk is traditionally cooked over coal and gains a delicious smoky flavour as the drippings flare off the coals and flavour the meat on the way back up. This rings true for both a marinade and dry-rub. It’s always best to cook your meat or fish in the centre of the oven to ensure that they cook evenly.

The base ingredients for Jamaican “Rice and Peas” where the peas are in fact red kidney beans.

The mix of rice, beans, thyme and coconut milk are not only delicious and reminiscent of the beautiful island but really helps to tame the spicy heat that Jerk delivers.

Cooked Jerk should be quite dark in colour, not from being burnt but rather from a combination of the cooking and the dark marinade itself. That’s the sign of good Jerk. Serve it up sprinkled with freshly chopped scallions and a drizzling of lime.

The rubbed Jerk chicken seen here is always somewhat lighter in colour than the marinated Jerk however, it lacks anything but flavour. I like to serve it with extra finely chopped chilies to really spice it up and to make up for the heat lost by using dry chili rather than fresh in the rub. That’s optional though, of course!

In this blog I’m giving you a list of the ingredients that must be used and that are virtually always present in the very best Jerk recipes. I will also give you other ingredients that are sometimes used and in either case the quantities will not be listed, that part’s up to you. Experiment to get an “inspired” recipe that follows the time tested method of the Jamaicans.

YOUR SHOPPING LIST OF INGREDIENTS

If you are making a marinade, all of the ingredients in the mandatory list below are required. If you are making a dry-rub, be sure to use only dry powdered ingredients from the mandatory list below, no oil, soya sauce or fresh ingredients. 

Mandatory ingredients:

  • Scotch Bonnet / Habanero peppers (these are synonyms for the ripply peppers seen in the first picture on the blog) (Hot pepper powder for a dry-rub)
  • Allspice / pimento / Jamaican pepper or Myrtle pepper (all synonyms)
  • Scallions / green onions (or onion powder for a dry-rub)
  • Garlic (or garlic powder for a dry-rub)
  • Ginger (or ginger powder for a dry-rub)
  • Fresh thyme (or dry thyme for a dry-rub)
  • Cinnamon
  • Nutmeg
  • Black pepper
  • Oil
  • Soya sauce

Optional ingredients (follow the same rule as above for a dry-rub):

  • Cloves
  • White or malt Vinegar
  • Orange juice
  • Sugar
  • Tamarind
  • Rum
  • Paprika
  • Lime
  • And anything else that may inspire you

Peking-Inspired Roast Duck

Duck was once reserved for special occasions and holidays but it’s becoming more and more popular and that’s not surprising considering how versatile and delicious it is. The trick with duck is cooking it and seasoning it properly which is quite easy to do provided you know how!

Peking Duck is a dish that originated in Beijing, China and variations of roast duck have been served since the Imperial era. In fact, variations of roast duck have been prepared and cooked in China since the reigns of the Northern and Southern Dynasties and can be dated at least as far back as 1330 in the book “Complete Recipes for Dishes and Beverages” written by the Hu Sihui, the inspector of the imperial kitchen of the time. The Peking Duck of today resembles the one that was refined to a true dish during the Ming Dynasty and by that time it was a standard on the tables of the imperial court. The dish is so renowned in fact and has been so popular in China since it’s commercialisation in the restaurant Bianyifang in 1416 that it has actually inspired the creation of different types of ovens specifically for cooking them and has altered kitchens all over the country.

Peking duck is traditionally served with sliced green onions, cucumber, sweet bean sauce and thin Chinese pancakes, though I like mine served with Hoisin sauce, fresh oranges, sesame seeds and spicy orange marmalade. Peking duck also inspires chefs all around the world who add their own flare to the dish. Such as I’ve done here! The possibilities are endless!

The first step is to prepare the duck and to season it. Duck is often sold whole with the head, wingtips, flippers, tail and entrails still intact. If buying it from a butcher, you can ask to have all of these removed. Proceed by washing the duck thoroughly under cold water, inside and out, and pat dry. Season the entire duck, inside and out, and place it in the fridge for at least 24 hours prior to cooking it as this will ensure that the skin is flavourful once roasted.

That was the easiest part! The second step is a bit more tricky but absolutely imperative; the steaming process. If you already have a Fornetto you’ll know that there are two racks in the cooking chamber. Remove one of the racks from the oven and place it over a large roasting pan on your household stove and fill the pan with water. Place the seasoned duck on the rack and cover the whole thing with foil. Bring the water to a roaring boil and allow the duck to steam for 1 hour. You may have to add more water while steaming it. The steaming process is very important as duck has a thick layer of fat under the skin. By steaming it, most of the fat is rendered from the skin and it’s by doing this that you’ll end up with the highly prized crispy and flavourful skin one hopes for with roast duck.

One of the most traditional ways of roasting Peking Duck is by hanging it in a Chinese “hung” oven. The purpose of the hung oven is to be able to cook large quantities of ducks at a time however, I like hang-roasting foods so the entire roast cooks evenly, without lines, can be basted all over and doesn’t stew in the juices but rather the fat and excess juices drip away from the meat and can be discarded or turned into a gravy once done. Though the Fornetto’s cooking chamber isn’t quite tall enough to hang a whole bird vertically, I place the remaining rack in the highest position in the cooking chamber and using two sizes of steel hooks, I hook the smallest two through the front and the longer ones though the tail-end. This will place the duck on a diagonal allowing the fats and juices not to accumulate in the cavity.

Don’t forget to place a drip pan in the bottom of the cooking chamber or you will end up with a big mess. I like to line the drip pan with parchment paper which makes for very easy clean-up. Don’t forget to wear protective gloves when operating the Fornetto, including opening and closing the doors as well as handling anything directly from the oven.

When the duck is ready, serve it whole and carve it at the table as you would a chicken or turkey. Do not cover the duck after removing it from the oven or the skin will lose its crispiness and become soggy!

You can accompany the duck with your choice of sauces such as the traditional ones I named above or the way I like to serve it. (Seen in the image from top right going clockwise; fresh slices of orange, toasted sesame seeds, spicy Chinese mustard, spicy chilli and orange marmalade, spring onions, Hoisin sauce and in the centre a gravy made from the drippings in the pan).

Serve the duck thinly sliced using a very sharp knife taking care not to tear the skin away from the meat.

Check out the recipe for serving ideas by clicking here!

You’re in for a treat. Enjoy!

Chicken pot pie; a taste of home!

There are numerous things that make me think of home and of my youth when I think of food and recall all the great smells coming from the kitchen. I remember playing outdoors all year long as a youngster. When the sun was out we’d be at the side of a pool, when it was raining we’d trek through the forest, when winter came and we were off to Jamaica to visit with my British grandparents on my mother’s side, they wouldn’t see hide nor hair of us until it was time to come in and eat. It was the same back at home when we visited with my dad’s side, the Italian side.

My fondest memories aren’t necessarily those of the time spent outdoors building forts and such but rather the memory of being called back in to the house to eat. I was very fortunate growing up, I have to say, as both sides of my family can cook and though the cuisines are completely different, I was spoiled by taste and smell!

There is truly nothing better than walking into a home and being hit with a delicious mouth watering smell. That smell may be from the subtle baking of bread to the raging aromas of a delicious curry. I eat with my nose first and that’s followed by my eyes. My taste buds play the largest role of course, but if it doesn’t smell or look great I can assure you that my mouth becomes wary! Being half British and half Italian I was really lucky to have been brought up in a household with many different taste sensations, and the topper was the fact that my British grandparents lived in Jamaica which introduced us to a wealth of amazing flavours as well. All that being said though, I’m concentrating on a favourite my grandmother used to make and seeing that Jamaica isn’t exactly cold at any time of the year, chicken pot pie for me isn’t a cold weather food, but rather a dish best served whenever you long for hearty food and that homey feeling!

The recipe is easy and seeing as that we have already been over my standard béchamel recipe (click on it if you haven’t seen it!), all we need to do is refer back to that recipe, fry up some chicken, sauté some onions, chop up some vegetables and we’re on our way to a great chicken pot pie baked in the Fornetto.

I get lots of questions about making different kinds of pastry and to be honest with you, even if I can do it and understand the virtue behind making everything yourself, pastry is a time-consuming challenge. I’m not a pastry chef yet the pastry I make with the knowledge I have compares to any good quality store-bought puff-pastry, so I skip that task. Pastry making has a lot to do with being exact, like chemistry. In my experience, puff-pastry is virtually the same everywhere whereas bread is completely different from baker to baker. Dough is a very different thing and I never compromise on dough when it comes to homemade versus store-bought. There are no bargaining chips on the table when it comes to dough. Puff-pastry on the other hand, is something that many brands succeed at making very well. Dough however, be it for bread, pizza or the like leaves lots of possibility and I make my dough to my own taste. To be a little contradictory, there is one type of pastry that I do make and that’s my mother’s. We will see that soon when we look at pies made using a cold-water pastry!
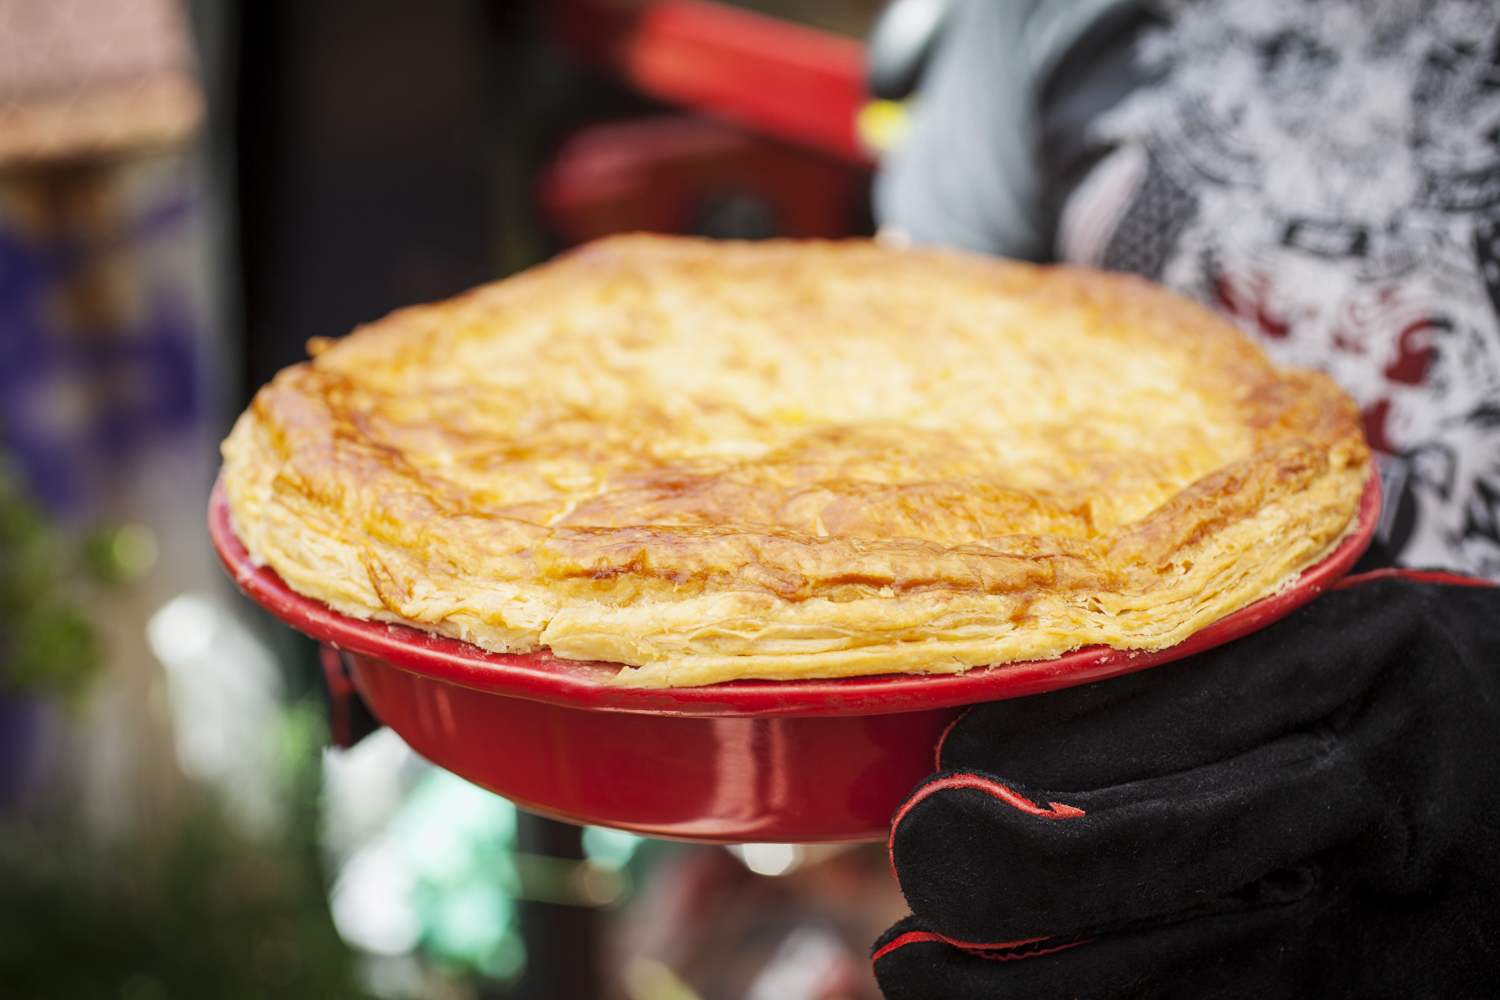
A really important aspect to baking a pie is the dish. Too shallow and you’ll end up with a tart, too deep and you’ll end up with your filling being undercooked and the pastry being overdone! The Fornetto pie dish is an ideal depth for a pie of any sort and I say this as a chef. The lip of the dish is also great because of it’s width and the small bumps of the design aren’t only an attractive design feature but based on my experience using the dish, they actually stop your pastry from shrinking back in on itself while it’s cooking. Click here for more info about the pie dish and to check out those bumps I just mentioned!

This chicken pot pie is really simple to prepare and yet so amazingly tasty. All you need are peas, broccoli, carrots, onions, béchamel sauce and the chicken, of course! Side it with a great lager and you’re good to go! Click here for the recipe!

What’s great about a chicken pot pie is that it’s a feel-good homey meal that satisfies even the hungriest of appetites. By all means, if you have chicken or turkey left over from the night before, don’t waste them on sandwiches. They work just as well in a pot pie!

You’re in for a treat. Enjoy!